

My passion for history and heritage
History and heritage as a child
As a child I was fascinated by history and heritage. I loved old things, going to museums and learning about history. Going through some of my old primary school books I came across a fabulous painting. It was a painting of a Roman centurion. I had a book on the Aztecs and was fascinated by a photo of an Aztec mummy.
Building a log cabin
I loved reading the Laura Ingalls Wilder Little House on the Prairie books, making a model of a log cabin, built with sticks. I even cut the sticks like the real log cabin builders did. The cabin was furnished, including a bed, complete with sheets, pillow and blanket, all handmade by me.
Whilst I was at high school I studied both art and history, doing both art and history O levels. I applied to university to do combined archaeology and history, as I’d decided I wanted to be an archaeologist. But unfortunately didn’t get the grades. A local college had a design course and the rest as they say is history.
After being made redundant from one design job I took a year out to undertake a post graduate diploma in Heritage Interpretation. I loved it.
Discovering re-enactment
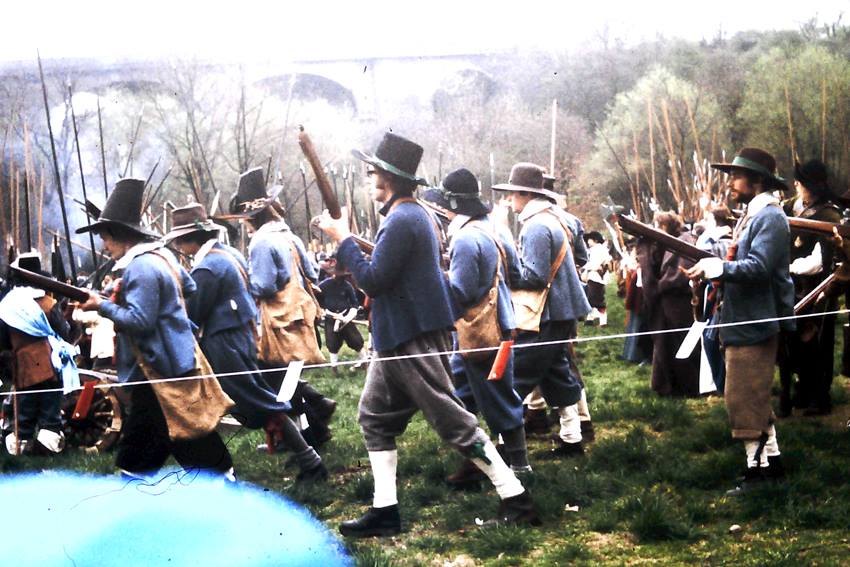
I always felt a bit like I didn’t belong in this century. I often wondered what it would have been like in different times. When I was a teenager there was a English civil war battle re-enactment in my local park. I went along every day it was there. It was great seeing all the clothing, the weapons and the tents and cooking areas. I wanted to try fighting, not just be a camp follower or work in the kitchen area.
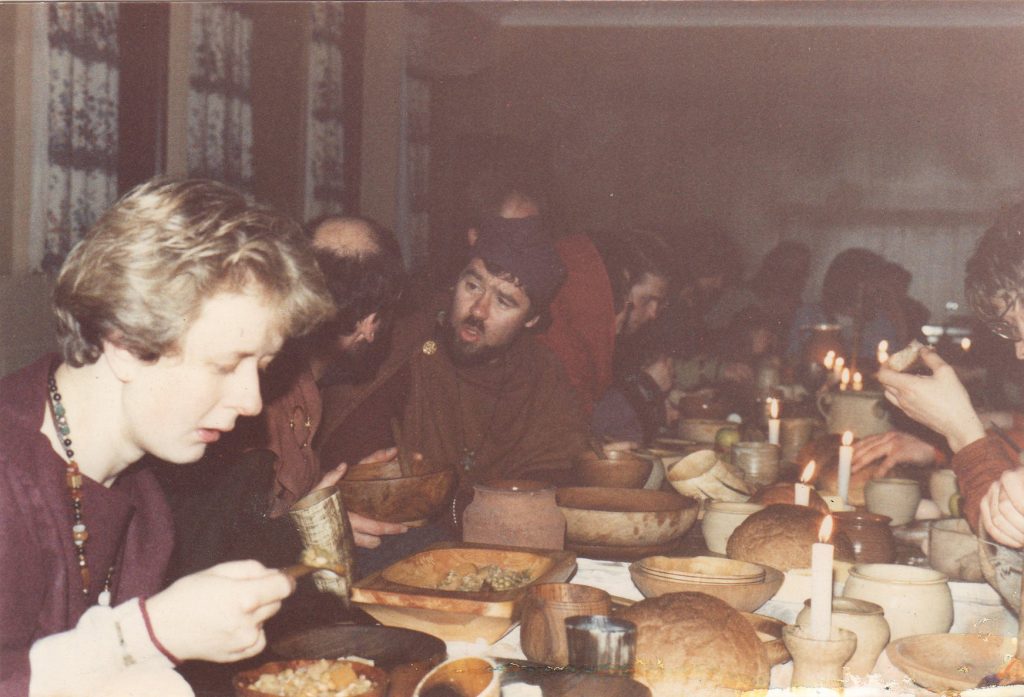
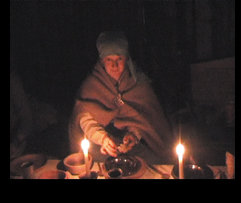
It wasn’t till many years later that I met a group called the Dark Ages Society. They were at an event where they gave a fighting display. I joined the society at an event and spent the next 16 years having a great time. We went away for weekends, make costumes, had banquets and taking part in displays. I fulfilled my wish to fight. Spear and shield in the line came first, then with a 2 handed spear. I learned a lot about Viking culture and even tried to learn Old Norse. Then I had an accident and I had to stop. Devastating.
Family history
In my twenties I started researching my father’s Irish family. I went to Ireland to see if I could find any family members. More research has helped uncover what happened to my father’s brother who was killed during WW2. After that I researched my maternal great aunt and uncle who lived in Egypt. That proved to be an astonishing story, which I might talk about in another blog.

Umbilical to the past
I find it all fascinating: how people’s lives merge and diverge. I love how the gaps in family history can be filled through luck and research and often heal families. Programmes like Time Team (‘Digging holes in Britain’ as an ex called it), Long Lost Family, Who do you think you are? or Back in Time for Tea are great as they give us a window on the past.
I believe people’s personal and family stories are very important. They are an umbilical to the past. They are all of their time and are part of our social history and heritage. Recording stories, saves them for the social record for all time. I created Heritage Heroes Heirloom Films, to help people capture their family stories, so they’re not lost forever.
Heritage Heroes Heirloom Films
Looking for a way to record your family memories so that you can share with family around the world? Heritage Heroes Heirloom Films provide a way for families to record memories and reunite families, via the medium of film. They act as a memory making experience. Heirloom Films have emotional resonance and are a way for family storytellers to learn more about their family story. They are a way to capture family memories for posterity.
To learn more about how I can help you capture your precious family memories through our Heirloom Memoir, Heirloom Anniversary and Heirloom Ancestry packages, visit https://www.iconiccreative.co.uk/heritage-heroes or call 0775 3413005

Jorvik Viking Centre – My Top Ten Heritage Sites – Number 2
Jorvik Viking Centre
Unfortunately due to Covid 19 I’ve been unable to visit a lot of the sites in my Top Ten so have been unable to write any blog posts about them.
However, I did visit the Jorvik Viking Centre and the Jorvik Viking festival last February, just before the first lockdown.
I haven’t yet shared those photos, so, given it’s unlikely that I will be able to visit Jorvik any time soon, I’m going to share them now.
My trip to York and the Jorvik Viking Festival
This trip was going to be a test of all the fitness training I’d put in. It was only the 2nd trip I’d been on since working with my trainer on my mobility and I was a little worried that all the walking might be too much for me.
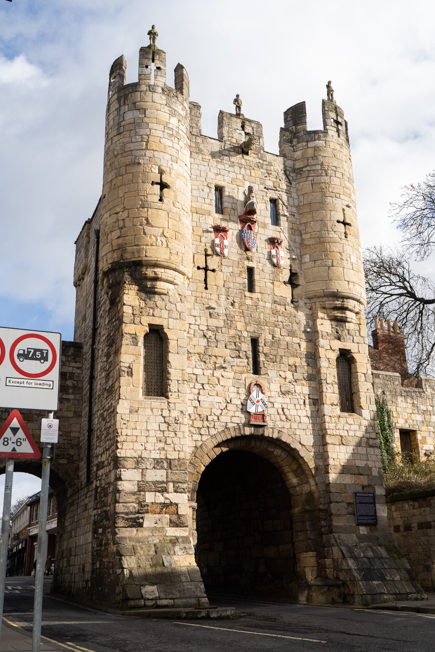
I arrived early and made my way into central York, popping into a couple of shops along the way.
So that I didn’t get too tired and miss out, I went straight to the Jorvik Viking Centre and joined the queue.
Jorvik Viking Centre
I had to stand for about 1 hour, but finally made it inside. I wouldn’t have been able to do that before, but I did have to ask for a chair once I’d got inside, so that I could rest.
The Excavation
In 1972 archaeological digs took place on the Pavement/Coppergate in York. This area had 9m of deposits which is very unusual.
Those layers were very moist and peaty which allowed the preservation of timber, textiles and leather. The conditions also preserved seeds, plants, bones and pollen. Such a vast array of archaeological material is rare as it normally rots away.
Extensive remains and material was found, showing that Jorvik was a large and important trading city. It allowed researchers to learn how people lived and worked, what they ate and how they spent their time.
The next question was how could all this material be showcased and conveyed to visitors in the best way.
The Re-construction
The York Archaeological Trust wanted to create a heritage experience that was as unique as the artefacts. They wanted to bring the material to life and create something that was almost like a film set. Visitors would travel round the experience in cars, an innovative and captivating experience.
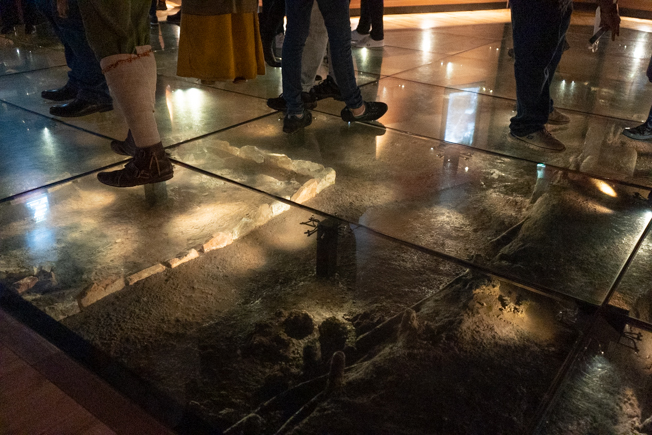
Before entering that main part of the experience, visitors are able to views displays about the excavations. You are even able to walk around/over some of the houses, which are displayed under a glass floor. This allows you to experience how large/small the houses were and a part of the street plan.
The Ride
Then you move on to the cars that take your through the reconstructed village. Different trades are depicted, with animated mannequins showing how the people would have lived. Areas that are covered include fishing, dyeing, slaves, magic and spirituality and food production.


To enhance the experience the mannequins ‘speak’ and talk about their particular specialisation. Particular smells relating to the specific areas are also used to make the experience even more authentic.
The Display Section
Once you’re through that section, there is a display section showcasing some of the finds that were discovered on the excavation, including a fossilised Viking ‘poo’ which causes great hilarity amongst a lot of the younger visitors.


At the beginning, outside the attraction, and strategically placed throughout, costumed staff help guide visitors and answer questions. They’re not a totally living history set up or ‘first person’ re-enactment like the costumed interpreters at the Irish Life Viking Adventure that I was involved with in Dublin.
This is due to having to deal with 21 century equipment and safety requirements. However they are dressed in viking outfits, take on viking names and talk about the period knowledgeably to visitors.
Jorvik Viking Festival
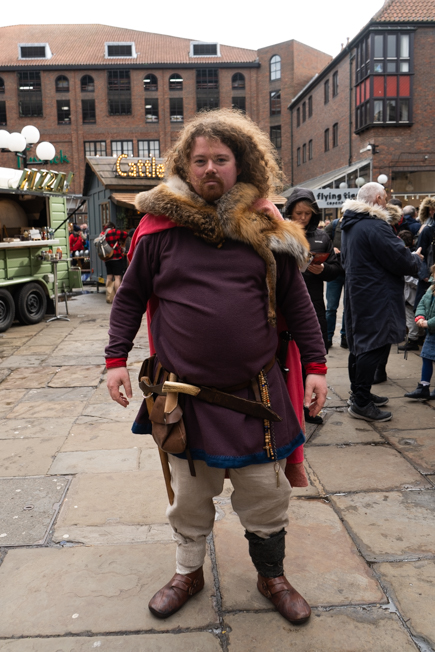
I’d timed my visit to Jorvik Viking Centre to be during the Jorvik Viking Festival so there were lots of re-enactors wandering around in Viking costume, with swords, shields and spears. There were also lots of stands, both inside and out, selling replica Viking jewellery, drinking horns and other Viking goods.
Shopping (well I am a girl 🙂 )
Deciding what to buy proved very hard as there was so much choice, but in the end I bought a new Viking kirtle (dress), a drinking horn, horn spoon, some glass beads and some leather thonging to thread them on. I could have spent sooooooo much more 🙂
‘The Vikings are coming!’


There were due to be other events such as a living history event with Viking tents and crafts people demonstrating crafts such as metal and leather work. There was also due to be a staged fight, but because the weather was so wet and cold, these were cancelled and the Viking re-enactors just did a march through the streets, which proved very dramatic.
The story behind my short film What did you do in the war Grandad?
Tips to help you make short films on a budget.
To discuss your creative project requirements call 0775 341 3005 or email info @ iconiccreative.co.uk.

Video series: How to position yourself on screen
Over 2020 more and more people have had to work from home. They’ve had to become comfortable with online communication. Methods such as Zoom, Microsoft Teams or other online networking platforms.
This can be a little daunting if you’re not used to being in front of a camera. In this short series of blog posts, I’m going to talk about some basic tips to help you become more confident on screen.
Since March I’ve taken part in hundreds of online networking meetings. I have seen people making all sorts of mistakes positioning themselves on screen.
News readers as reference
News readers are a great source of reference. The camera person moves the camera so that the news reader is positioned properly, and the ‘rules’ are the same.
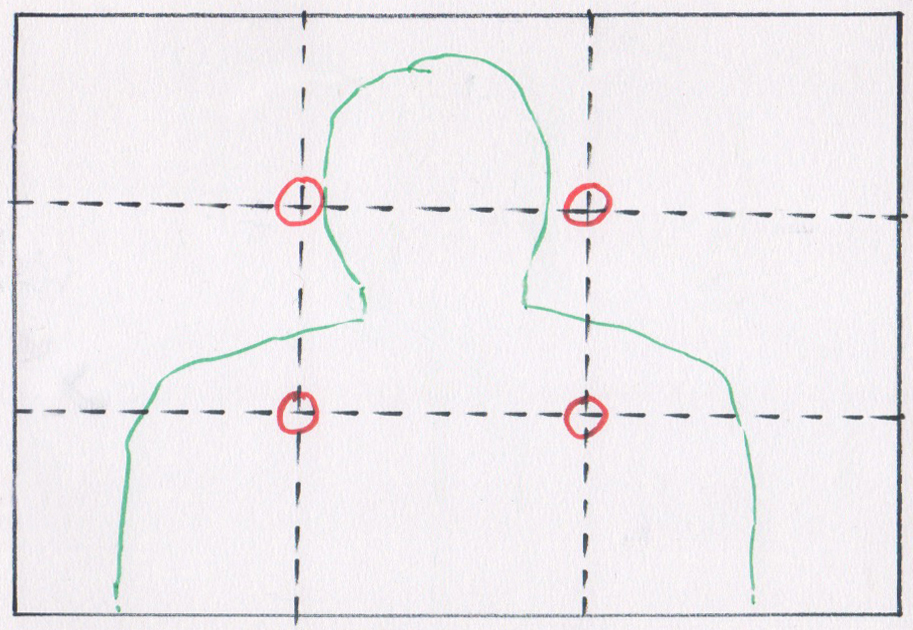
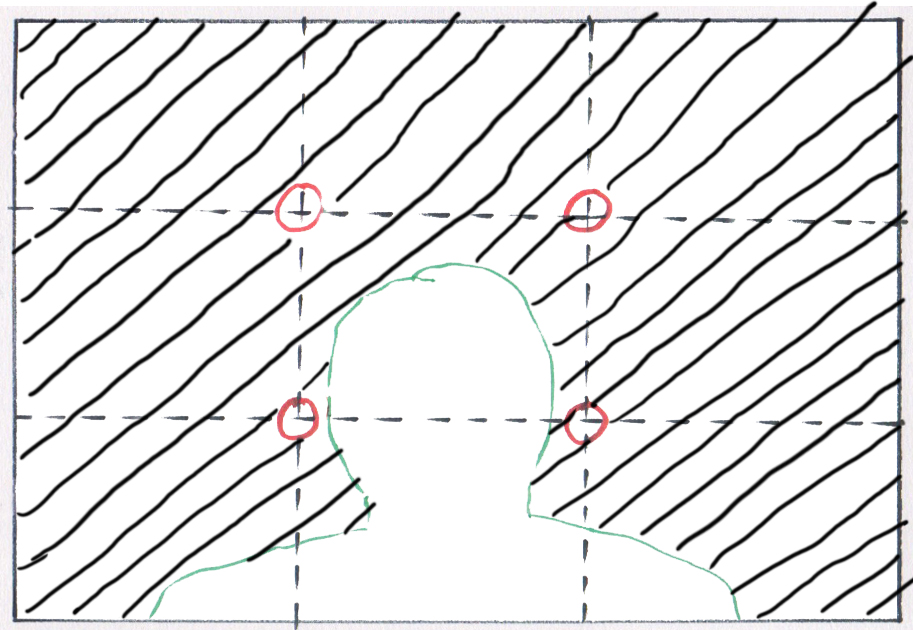
Imagine the screen being divided horizontally by two lines and vertically by two lines. This gives a total of nine rectangles. The points where the lines cross are called Power Points.
Power Points and Central Positioning
Position yourself on screen, where the centre column of three squares are, between the Power Points. Make sure your head is near the top of the screen, about three quarters of the way up the top rectangle.
A Strong Presence and ‘Negative Space’
This gives you a strong presence in the space, and balances your ‘shape’ against the ‘negative space’ around you. Negative in this context doesn’t mean bad, it’s an artistic term.
If you position yourself on screen with your head/face further down the screen, you become less prominent. You also look less powerful and the ‘negative’ space becomes unbalanced.
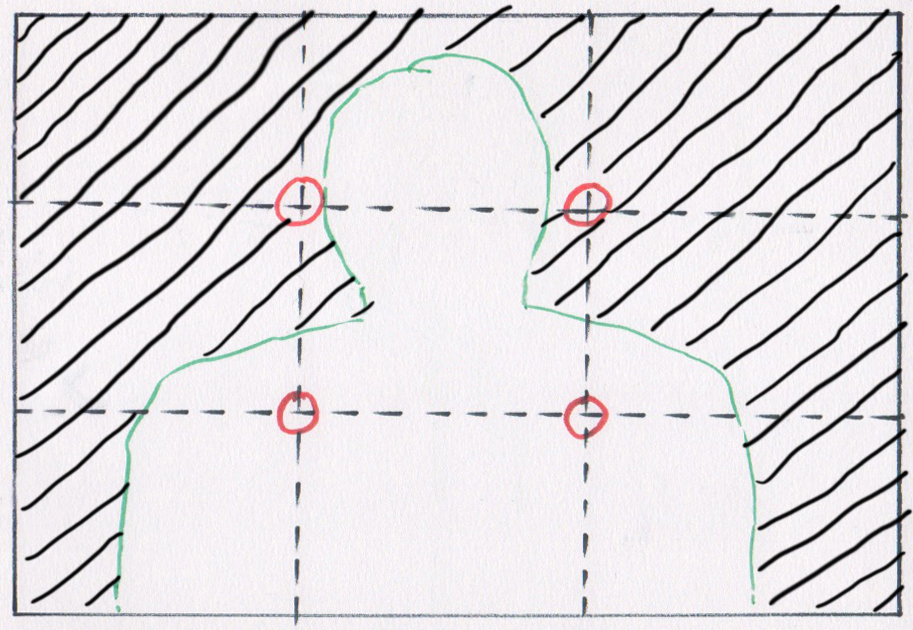
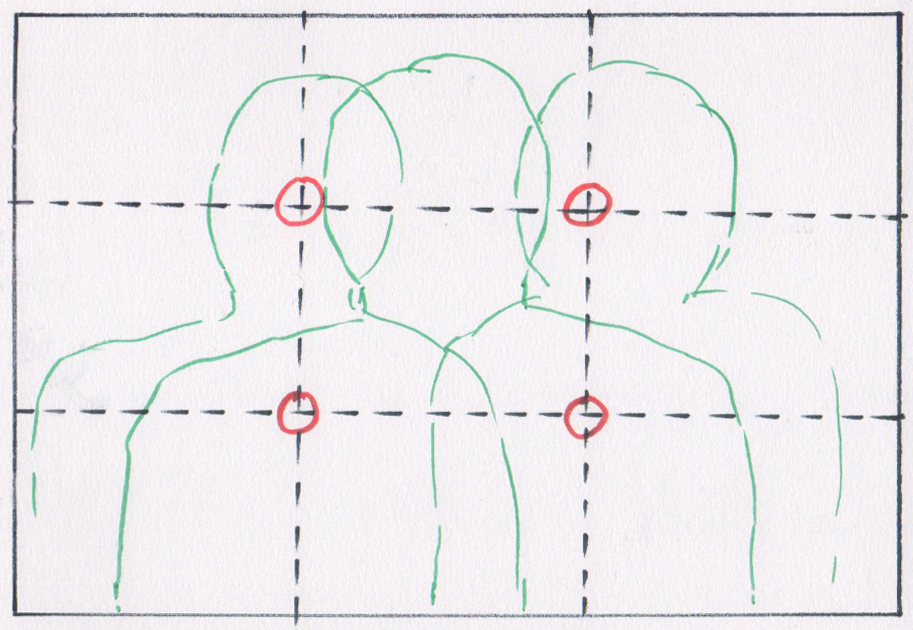
Creating space to add a graphic
If you want to add a graphic later in an edit, it is good to consider positioning. Position yourself on screen either to the right or the left of centre, over the Power Points. Make sure your head is in the same position as when central. This allows space beside you for the graphic.
I hope you found this blog post about positioning yourself onscreen helpful.
A video promo I produced for painter and printmaker Jessica Rose
Have you been thinking of filming projects, but not sure what equipment to use? Check out my blog post The little guide to mobile phone filming here.
To discuss your next video promo project needs call me on 0775 341 3005 or email info @ iconiccreative.co.uk

Create with Canva for your social media
Do you struggle to design amazing graphics for your social media?
Does the idea of design, colour and fonts bring you out in a cold sweat?
Creating eye catching, effective social media graphics that help you get more contacts and leads, can be a challenge
One solution is Canva.
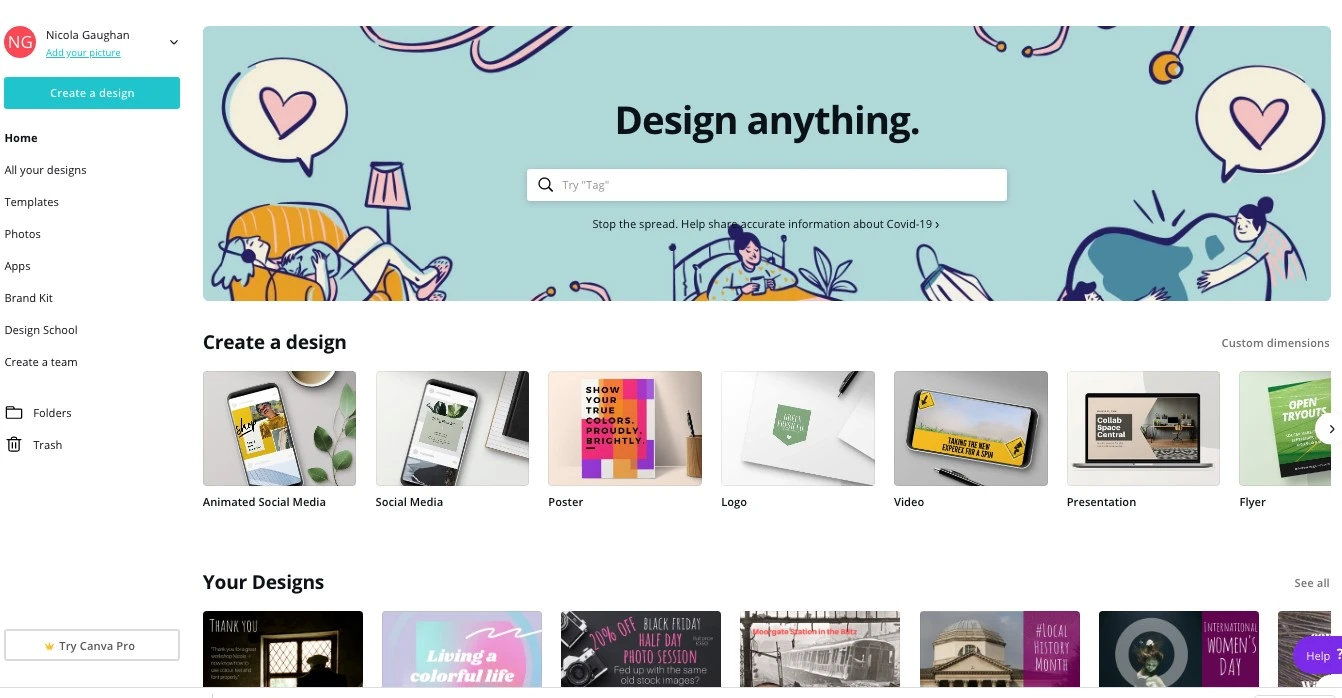
Canva
Canva is a basic online design software which gives you the option to create all sort of marketing materials, from social media memes and headers to posters and leaflets. The free option is suitable for most needs and a paid option for bigger organisations and teams, or if you want more flexibility.
Grids
Canva has lots of different grids that you can use to make your design look interesting. Some are really basic squares. Others come with diagonals, slices and other options.

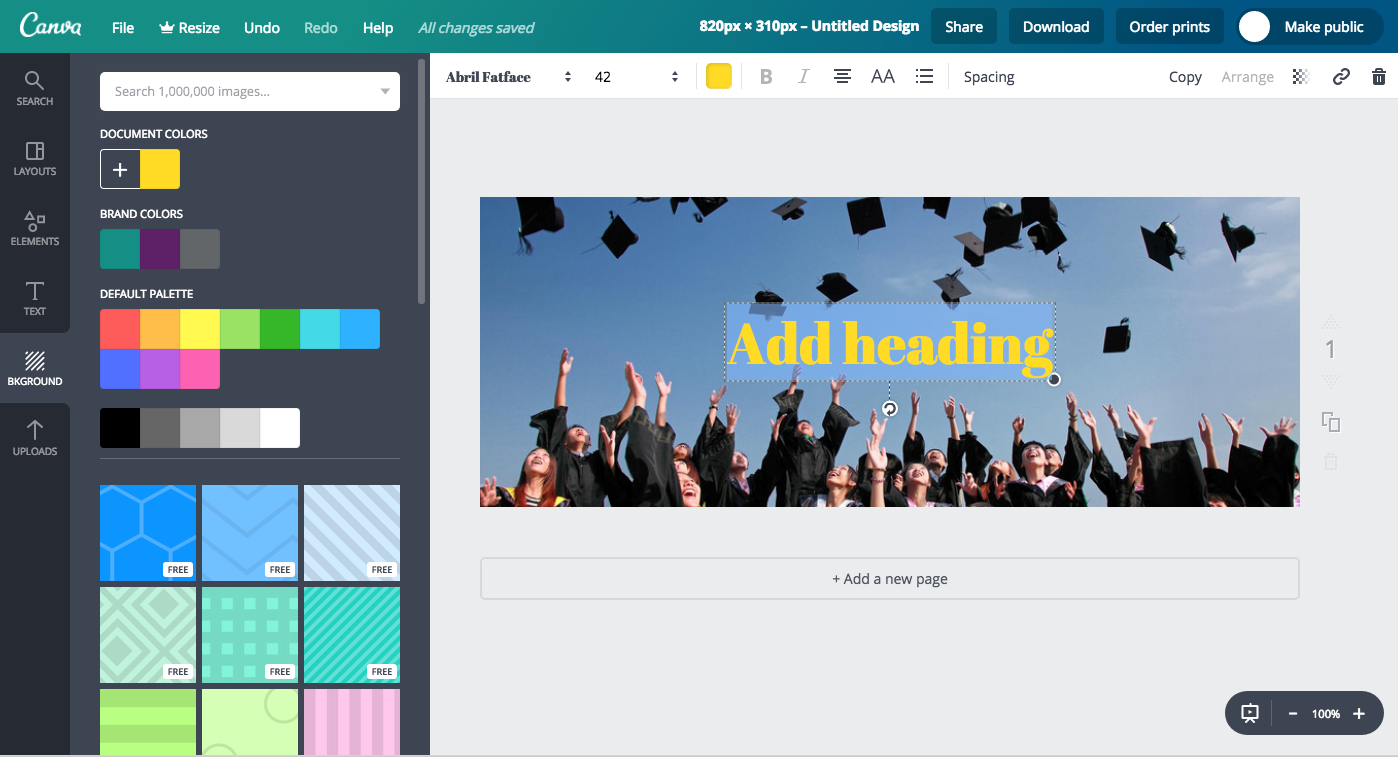
Layouts
Canva has extensive predesigned layouts you can start with. All you do is replace the image to one that is more suited to your message. Same with the fonts and/or colours and hey presto you have your fabulousdesign.
Brand colours
The free option lets you use 3 brand colours (as well as Canva’s default palettes). To add your brand colours to the palettes, you need to know the hex number (#xxxxxx) for each colour. Ask your designer for that. There are also free RGB to hex converters available on line, so you can make sure everything is consistent to your brand.
You can also create your own colours using the included colour wheel option, so you can design your graphic in any way you want. Every time you create or use a colour, it remains in the colour palette for the particular project your use it in.
You can also amend those colours to make them into dark or lighter tones of the same colour. For instance, you can make the tint darker by increasing the black. This colour then also goes into the colour palette for the project.
If you opt for the paid version, you’re able to include your secondary brand palette colours.
Fonts
Canva has a range of fonts preinstalled. Some of the fonts are similar to standard fonts used in design and Word. One such font is Helvetische, the equivalent font being Helvetica.
Aileron is another font which is available in Canva and in design or Word. It’s similar to fonts such as Arial, Verdana and Calibri in Word
If you opt for the paid version, you can add your own brand fonts. This helps you keep all your material ‘on brand’.

Font combos
Canva aslo provides font combinations which are great start for the novice user. These combinations can also be adapted, changing the font and the size, once you get more confident.
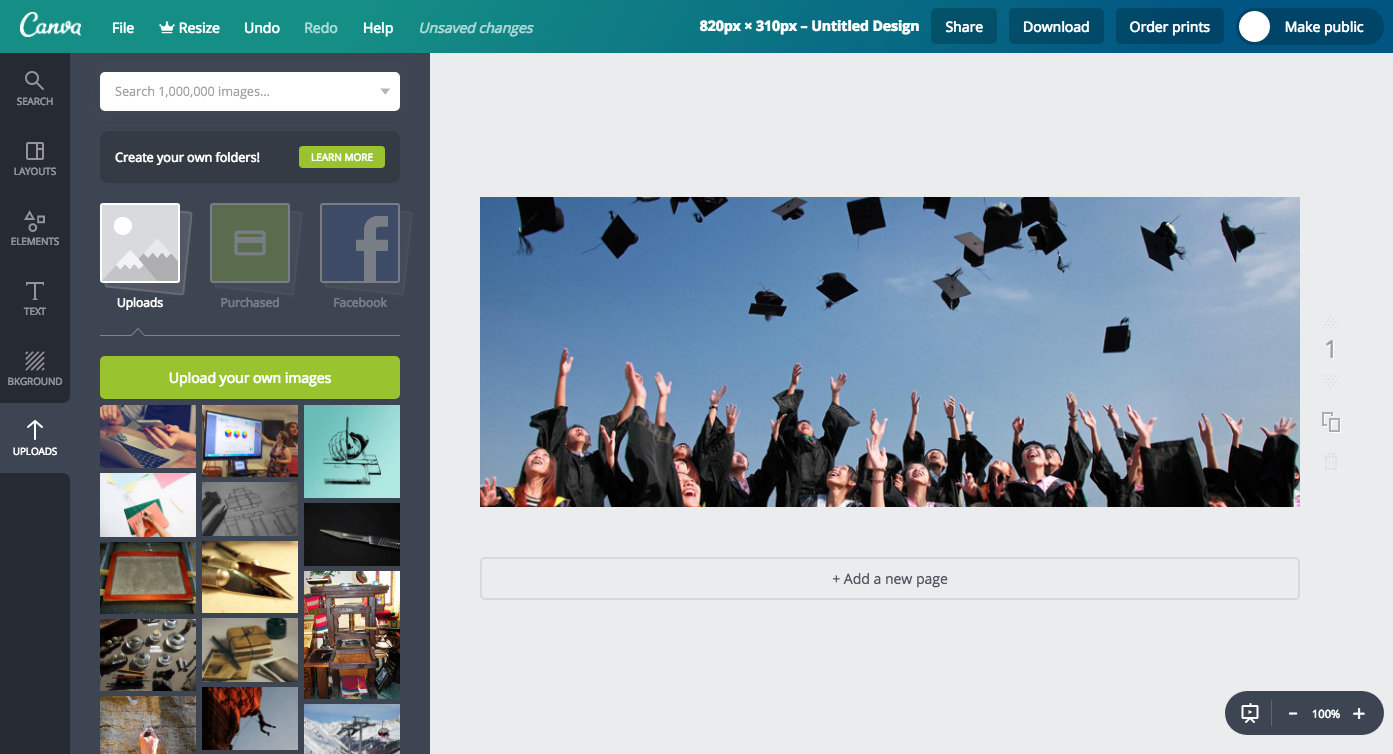
Images
Canva has a basic range of free images preinstalled. It also has the option to buy some for very low prices ie $1.
You can upload your own images that you’ve taken yourself, or got from a stock library. Also you can add photos from your Facebook camera roll and other social media sites.
There is also the option to upload your own logo files, as jpegs, or as pngs. If your logo is uploaded as a png, it should have a transparent background and you can use it over images to brand your graphics.
Shapes, lines, icons and charts
Canva has lots of different shapes that can be used in designs: squares, circles, triangles and stars etc. It also provides a vast array of lines, icons and charts that you can use as the start for your design.
Backgrounds
As well as layouts, Canva also provides patterned backgrounds for your designs. You can change the ‘colourway’ (ie the colour) of these designs easily, keeping your material consistent and ‘on brand’.
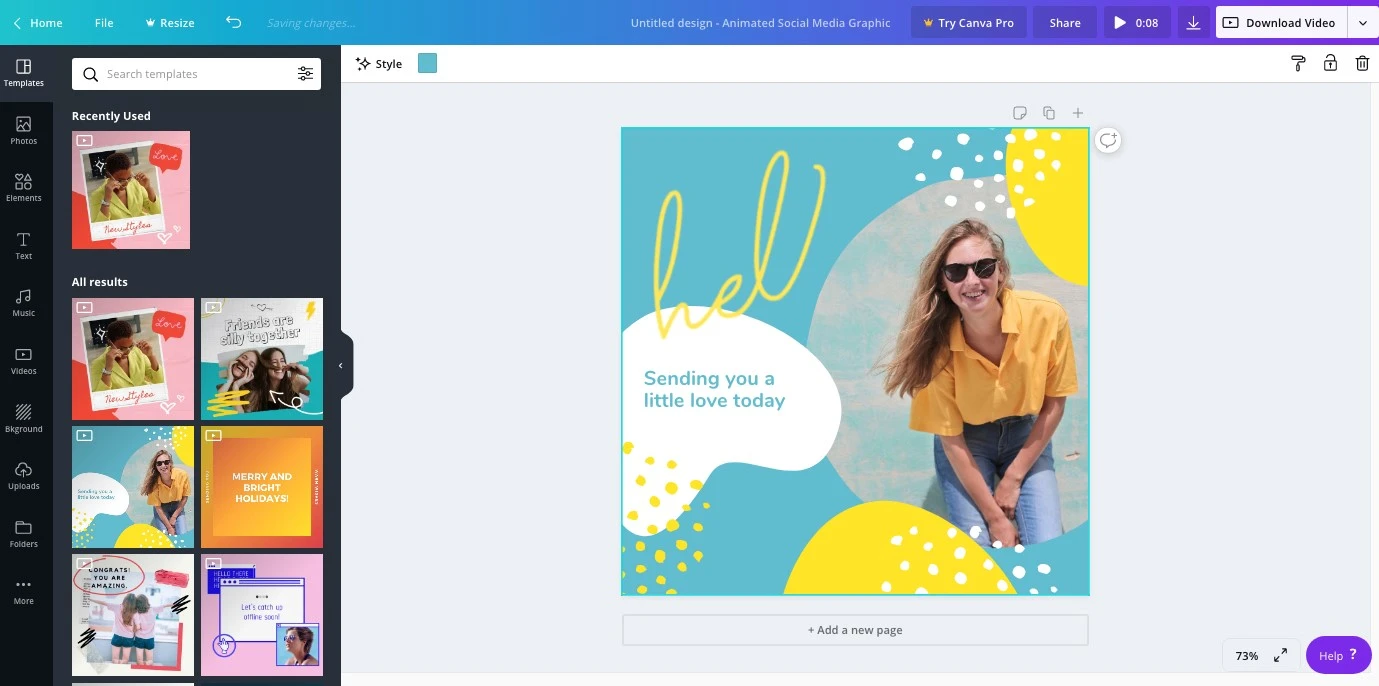
Animated Social Media
In the new, upgraded Canva, you’re now able to created animated social media posts and Canva provides pre-existing animated templates for you to use.
In the free option, you are able to change background colours, element colours, fonts, image effects and so on. Images can have filter effects such as a retro feel or high contrast. Colours come with suggested possible colour combinations or ‘colourways’.
You can also connect to different animated elements and change those, such as TV flashing background effects, or a glitch effect.
In the paid option you’re able to create transparent backgrounds to images.
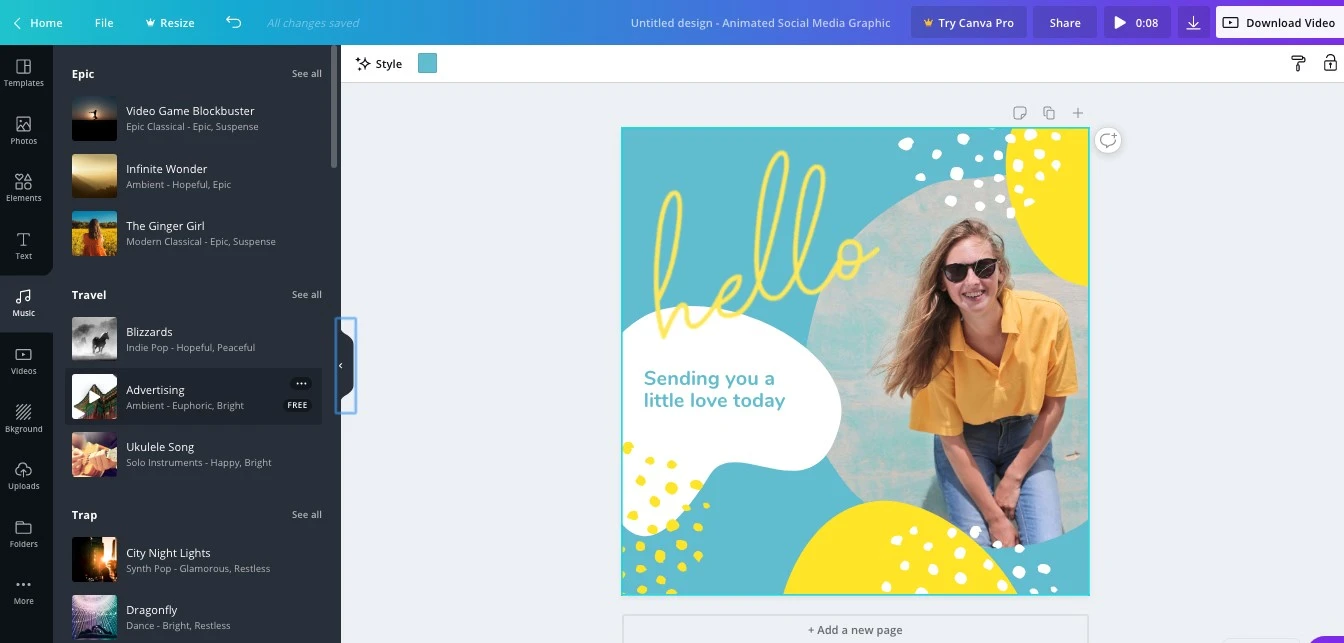
Music
Canva also now provides the ability to add music to your animated graphics. It provides some tracks for free.
Video
As well as music, Canva also now provides stock video clips that you can use in your social media posts. You can also add your own videos.

Connectivity
Canva lets you to add images and other media from Pixabay, Pexels, Instagram, YouTube and other sites.
What you can make in Canva


Canva training
To help you get to grips with Canva, I have 2 offers available.
1) 1:1 90 Minute training session for £99.
During the session I guide you through all the tools, how to use them effectively, including advice on design principles and techniques to add that extra zing to your designs.
At the end of the session you will be able to create
· A social media post
2) 3 x1:1 90 Minute training session for £249.
In the sessions I take you further into creating your own designs, taking you through the tools, including design principles. I help you create a leaflet or poster for print, explaining things like bleed, crop marks and creating a print ready pdf.
At the end of the 3 sessions, you will be able to create:
Static social media post
Print ready leaflet
An animated or video social media post
To learn more about the design process check out my blog post 13 key steps in the design process here.
To book your Canva training sessions, or to discuss your design projects, call me on 0775 341 3005 or email info@iconiccreative.co.uk
@ Nicola Gaughan, Iconic Creative Consultants 2020

HMS Belfast – a pre Covid 19 trip
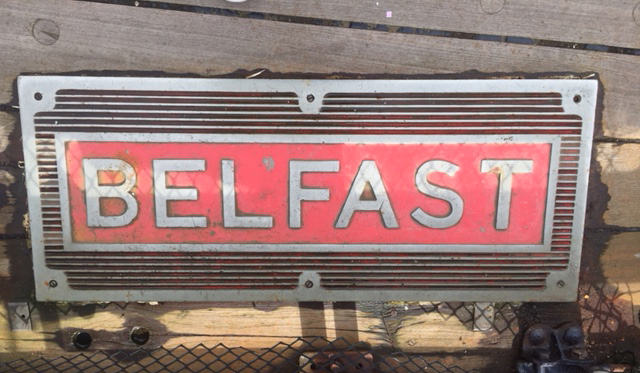
HMS Belfast trip
I’ve spent the last week struggling with IT issues which still aren’t sorted. I currently can’t access my photos from my Jorvik trip or the film rushes I recently did for a client, to create his video.
So what can I do I ask myself?
Why not a post about my last photography trip to the HMS Belfast? I had the photos on my mobile and haven’t had a chance to download them yet.
I haven’t been on HMS Belfast for years. I’d forgotten just how big it is. I had to be careful given my spinal issue, but because of my work with my trainer, I was able to manage the ladders better than I expected.
The Ship Tour
I started the tour in one of the gun turrets. A video showed how it would have operated during the war. The floor shook when the guns fired. It was quite scary and very claustrophobic. Not somewhere I would have liked to have been.


Inside the Ship
I then moved inside, seeing places like the kitchen, the sickroom and the Artic Messdecks where the crew slept in hammocks. I saw where the woodworkers and metalworkers would have worked, where the sail makers worked and where the Admiral and Captains slept. There is a Bursar’s office where money and food would have been purchased. I also popped into the communications room and had a go tapping out my name in Morse Code.
The Admiral’s Bridge
I also visited the Admiral’s Bridge which was great as I got a chance to sit in the Admiral’s chair. The view from the bridge is great.
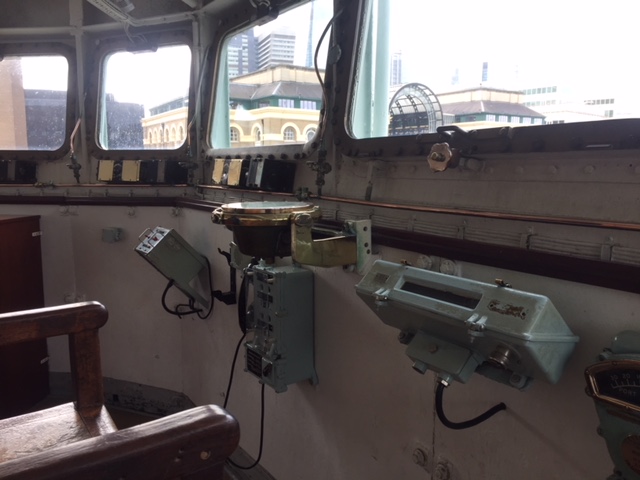
Out on deck it was very blustery, but no where near as bad as it would have been in the artic. There are good views up and down the River Thames. HMS Belfast is moored near the Tower of London, so there is also a great view of the Tower.
HMS Belfast is a great day out for anyone interested in naval history, World War 2 history and the Artic campaign. There is a lift to access some areas of the ship, but overall it is not that disabled friendly. There are a lot of ladders, many of which are quite steep. Some of the hatches were very narrow, making it difficult to get through if you aren’t that mobile.
The story behind my short film What did you do in the war Grandad?
Tips to help you make short films on a budget.
To discuss your creative project requirements call 0775 341 3005 or email info @ iconiccreative.co.uk.

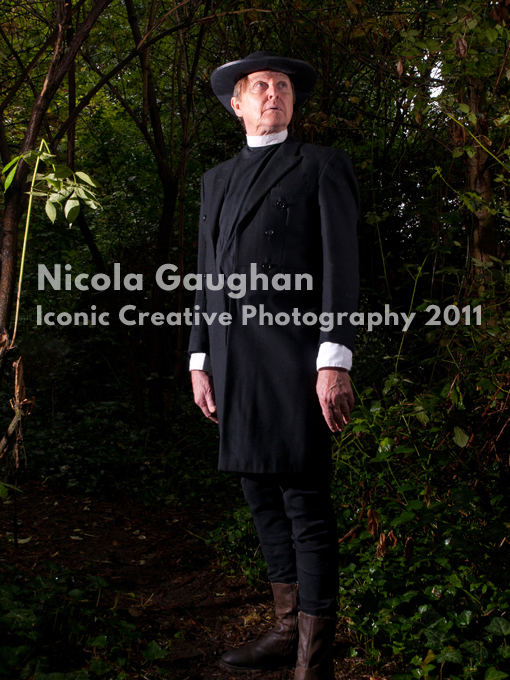
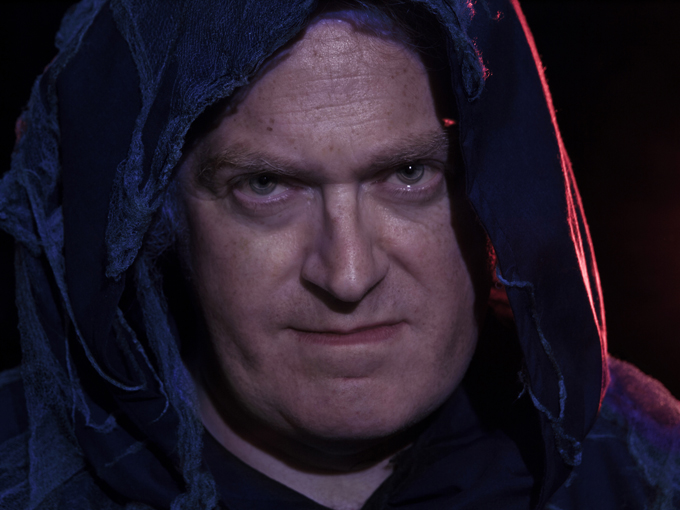
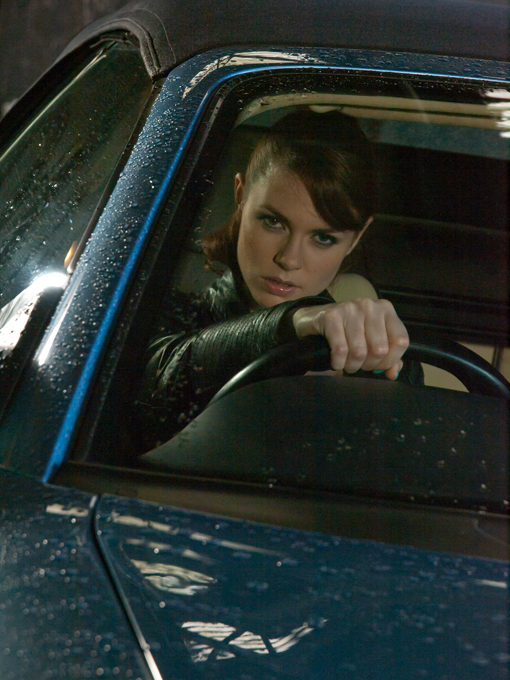
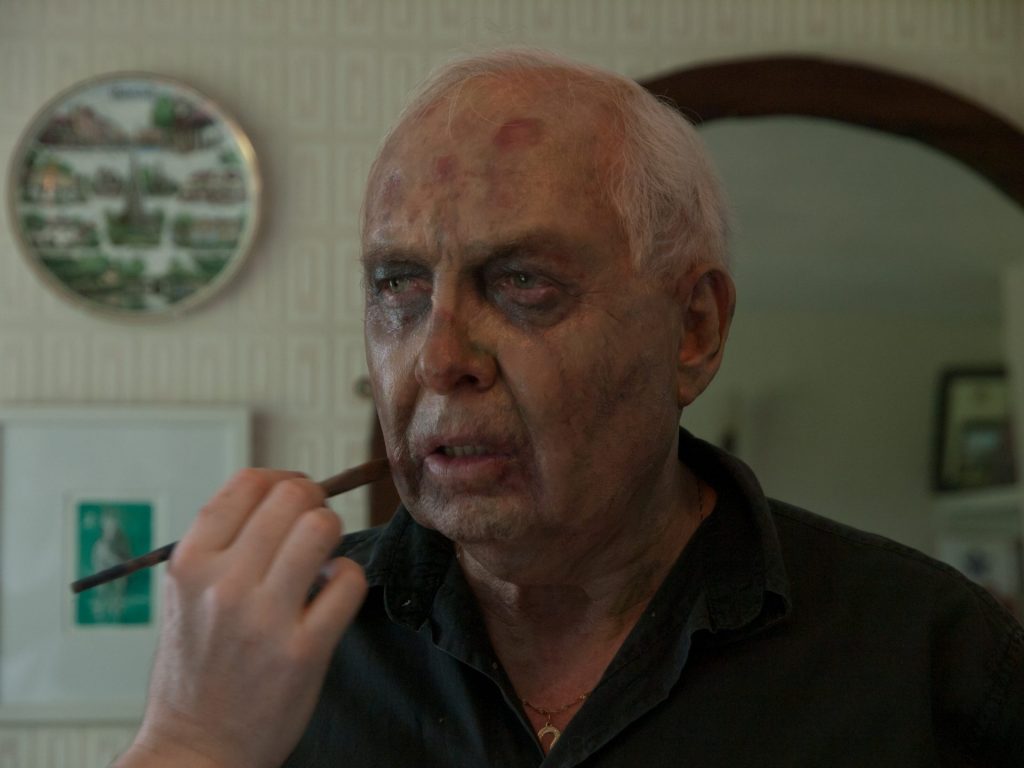
Film stills photographer
What is a stills photographer?
A still photographer creates film stills (unit stills) during a film shoot which document the shoot. These are still or static photographic images, rather than film/moving images.
What does a stills photographer do?
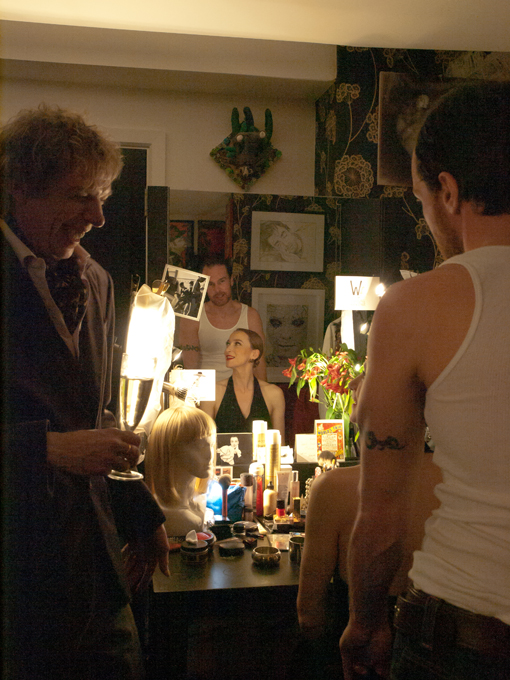
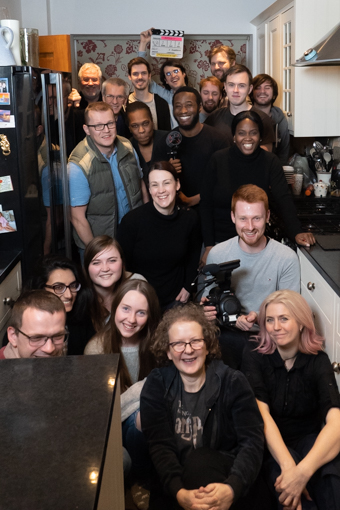
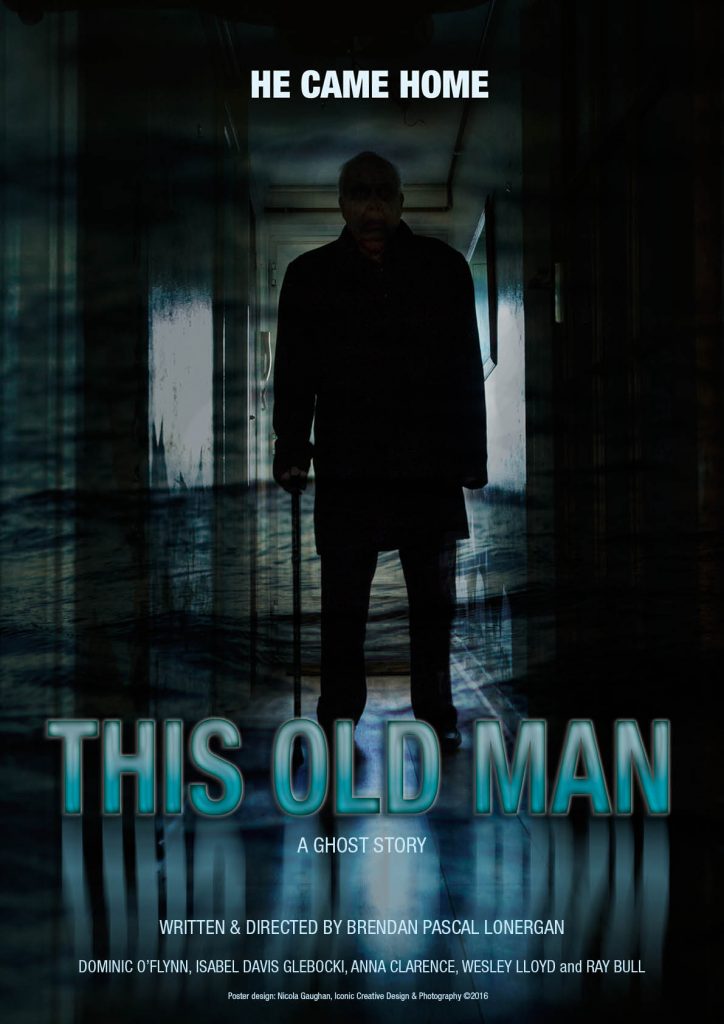
A stills photographer creates images that provide behind the scenes coverage on a film/TV shoot. Stills photographers also create images that are specifically intended for use in the marketing and publicity of feature films and TV productions. This includes headshots, images for posters, DVD wraps and social media.
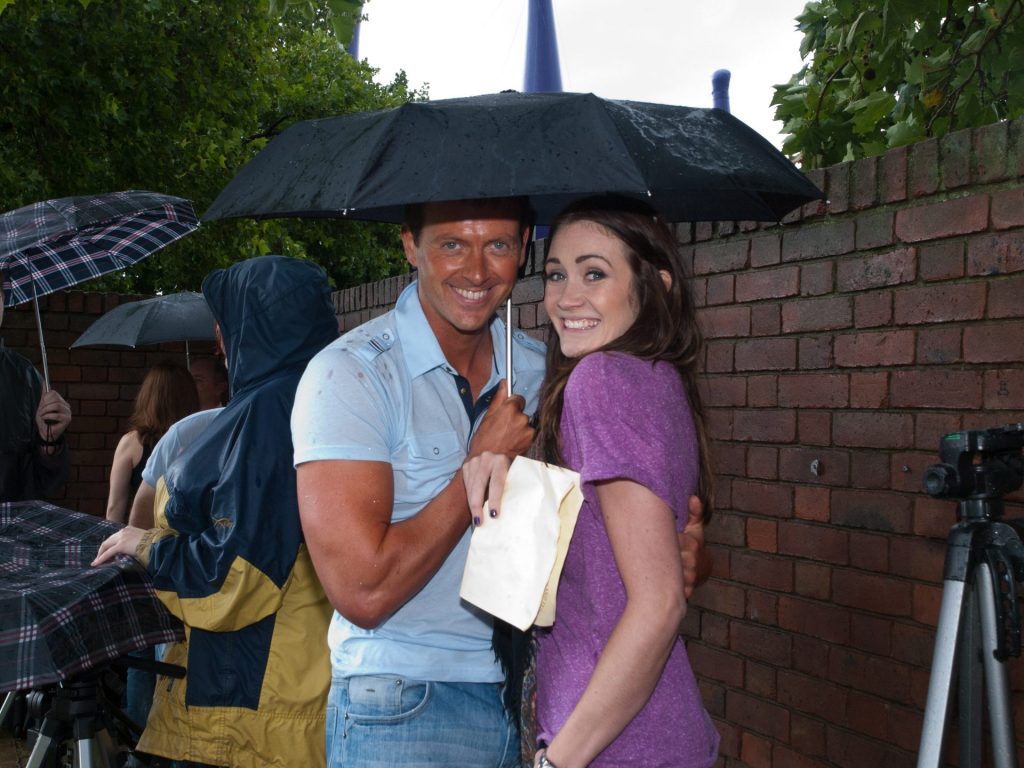

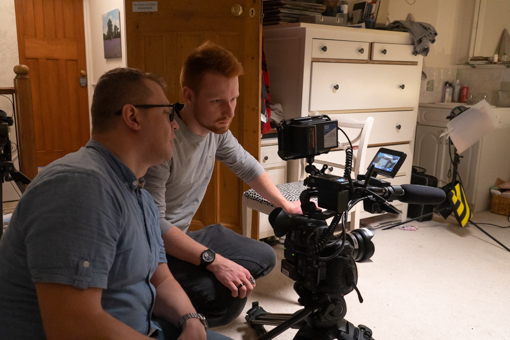
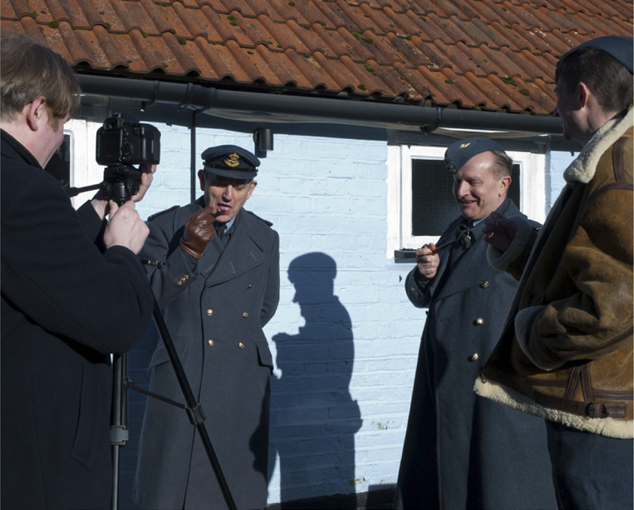
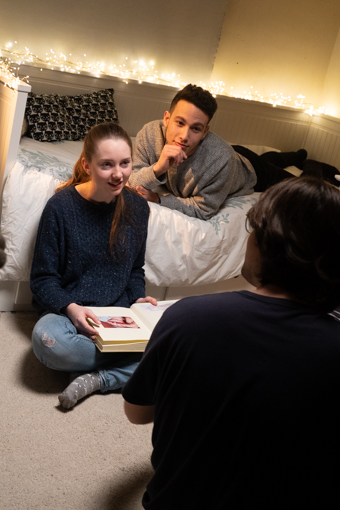
Behind the Scenes shots can cover a wide variety of images.
Crew setting up equipment, the director talking to the actors about their shots. Rehearsal and ‘blocking shots’, where positions and action are practised. Actors being made up. Prop makers at work. Giving a record of the production, and an insider’s view of the film.
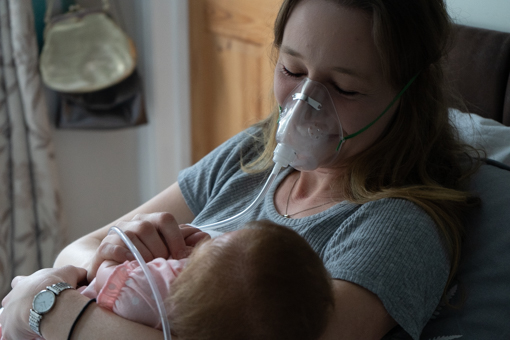
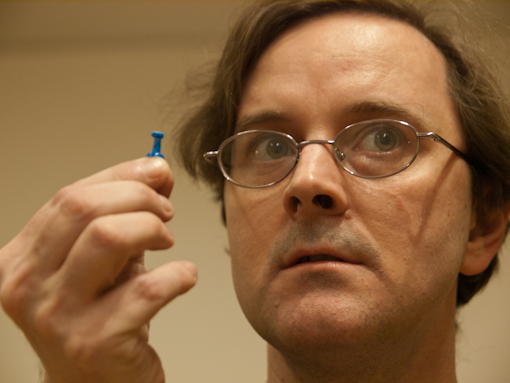
Stills photographers also create images that used in the actual production as props.

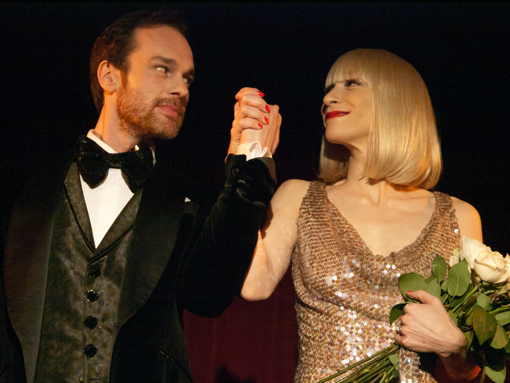

Theatre stills
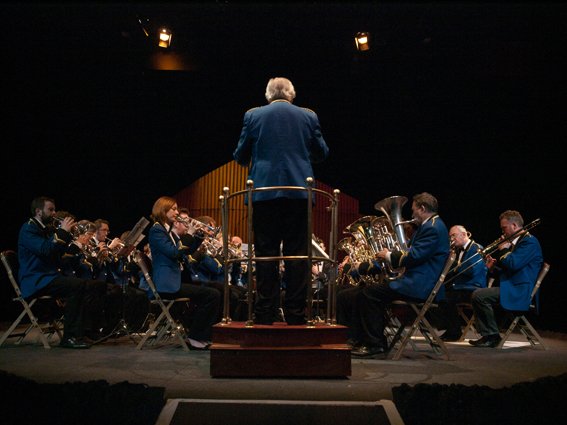
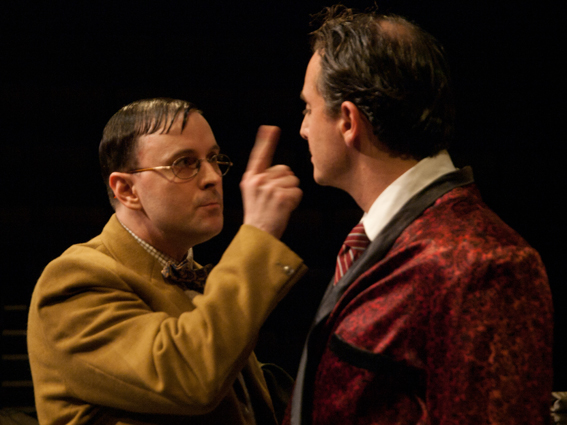
Similar to a film stills photographer, a theatre stills photographer creates images of the play, the actors and the action. Documenting the rehearsals and providing images for promoting the production.
What are the benefits of being a stills photographer?
The benefits of being a stills photographer are that you get to see behind the scenes of how a film or TV production is made. You are legitimately allowed on set and to go where you wouldn’t normally be allowed to go. You learn a lot about how a production is made, you get to interact with the key players such as the director and the actors.
Your work becomes part of the history of that production and your name becomes associated with it. You get to see your work up on the big screen, adverts or online in the promotional material.
NB All images are copyright Iconic Creative Consultants and may not be used without written permission.
Learn why cropping your photos is a great way to improve them.
Check out my other film and theatre stills work .
To book me for film stills or theatre stills work, call me on 0775 341 3005 or email me info @ iconiccreative.co.uk

Museum of London Docklands
I’ve only recently learnt about the Museum of London Docklands, so decided I needed to investigate it.
A short walk from West India Quay DLR station, the museum is easy to see from the train and easy to find. Based in an old warehouse, the museum is situated on the waterfront.
Starting the Tour of the Museum of London Docklands
The Museum of London Docklands is based over 3 main floors. The cafe and shop are on the ground floor, so you start your museum tour on the 3rd floor. Working out how to use the lift was the first task. The buttons are on a pillar not next to the doors.
As the Museum is housed in a warehouse, there is a lot of space so it is easy to move around, which is great for wheelchair users. The first area covers the history of the area as a docks area, the housing and transportation of goods.
The displays explore the equipment that the dock workers would have used to move, test and weigh the goods. Photos and film add more detail, giving a more in depth experience.

What I did find odd, was the colour of the information boards. Some were bright red, some were blue and some were gold. I’m not sure if there was a specific reason for this (ie blue for one type of product). I found the red particularly difficult to read and my eyesight is good. I would think someone with eyesight problems, especially those that are colour blind, might find it even harder.
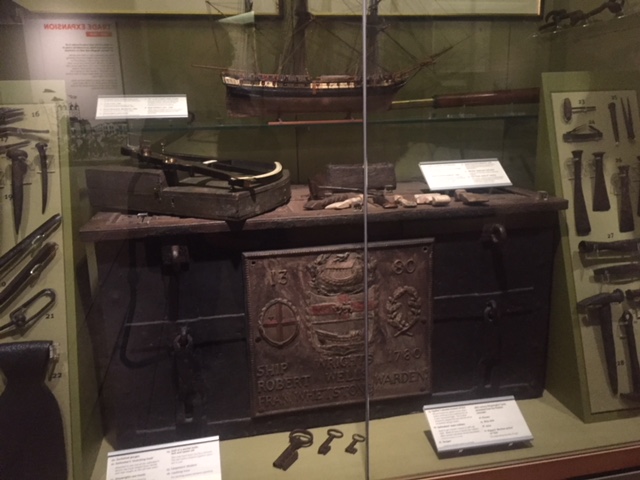
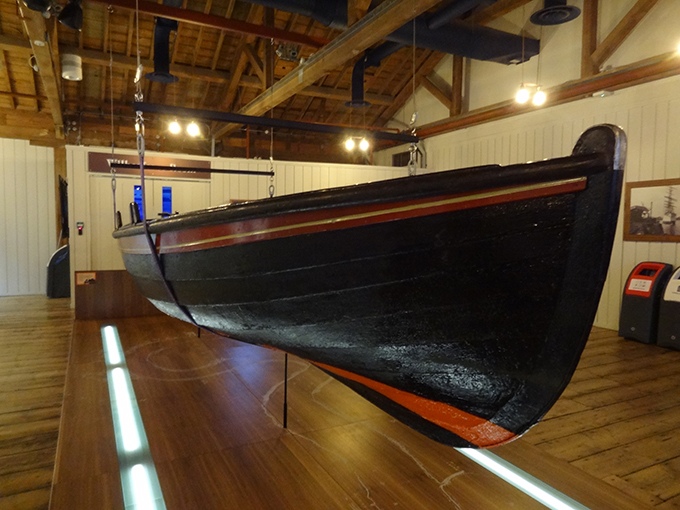
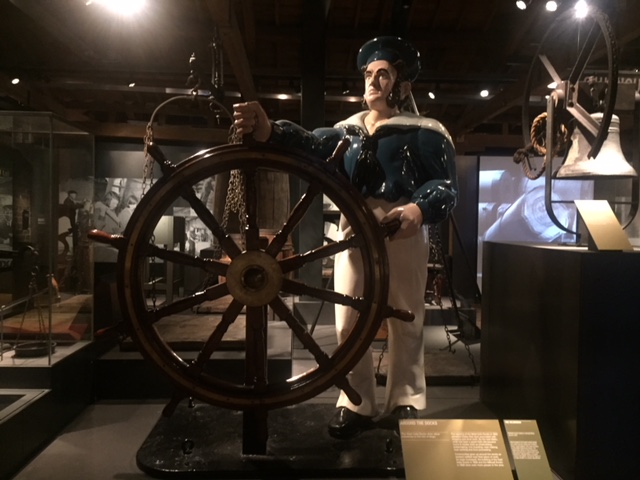
Shipbuilding
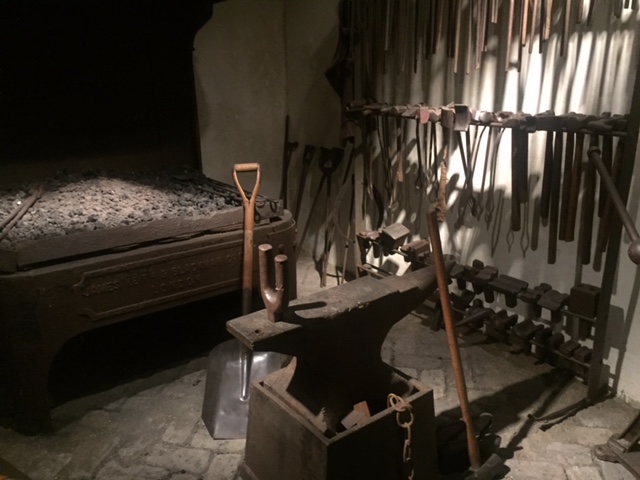
Ship building is covered, as well as how some of the packaging was made, a fantastic array of tools. In the area called Sailortown (a reconstructed London street) there was even a reconstructed forge.
The Slave trade
A huge part of London’s wealth over several centuries, was based on slavery. At one point is the biggest player in the slave trade. Ships left the port carrying goods bound for Africa. Slaves were then acquired and transported on their thousands across the Atlantic to the plantations in the Caribean. Sugar and other goods were then transported back to London.
This inhumane practise is explored in great detail. Experiences of the slaves themselves, those that escaped and became free and those that fought to stop the appalling trade. It’s not commonly known, but that many women were critical to the success of the campaign, as well as campaigners such as Wilberforce, despite them not having the vote themselves.
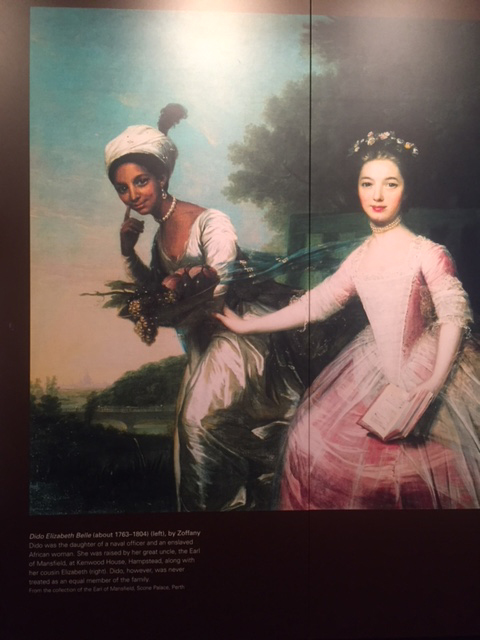
Africans have lived in London and the UK for centuries as a result of the slave trade. People such as Dido Elizabeth Belle. Dido was the daughter of a naval officer and an enslaved African woman. She was raised by her uncle the Earl of Mansfield, but was never really treated as an equal by her family. There is an interesting TV programme that looks at how the dress she wears in this painting was made. It can be watched here.
The Blitz
Another important facet of London covered in the museum is the Blitz and how it affected the east side of London. Docklands was central to both the London and national economy. If the docks were disabled you would be able to seriously reduce the city’s capacity for war production.
Lots of international trade passed through the docks. Damage this trade and you would significantly reduce the Captial’s economy and supply chains. As well as the docks area there were areas that were important to the industrial and storage industries. Areas such as the gas works at Becton were targeted.
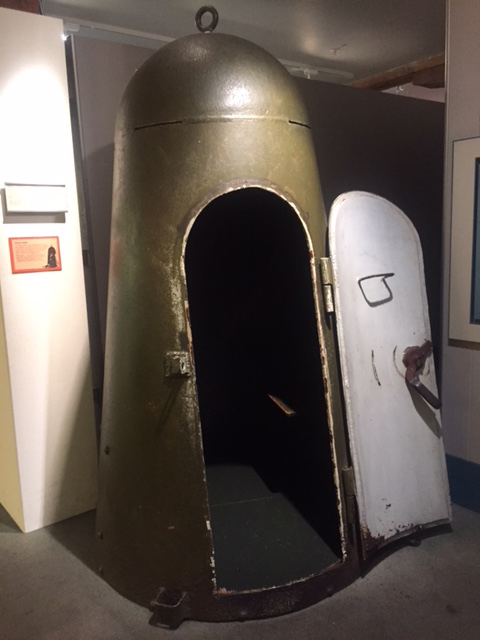
It was also felt that constant bombardment would sap public morale and reduce the spirits of the civilian population. However this proved not to be the case. The photo above is a bomb shelter for people manning ack ack guns.
Modern day
The last section in the Museum of London Docklands covers the growth and development of the Docklands area since the war, including the tube extension and the DLR.
From an interpretation angle, I would suggest the museum could improve it’s accessibility for the deaf community by adding subtitles to the videos. One video dramatised customers in a Georgian coffee house and their interactions. It was very hard to hear all the conversations due to background noise.
The story behind my short film What did you do in the war Grandad?
Tips to help you make short films on a budget.
To discuss your creative project requirements call 0775 341 3005 or email info @ iconiccreative.co.uk.

A trip to the Science Museum
The Science Museum
What to do on a Sunday when you have nothing planned?
This was the question I asked myself on Sunday. I decided a museum trip was in order, but which one? I’d left it a bit late so couldn’t go too far afield, but didn’t want to go to the V&A again so soon.
I decided that I hadn’t been to the Science Museum recently so would go there and see what was on.
Deciding what to see at the Science Museum
Over a quick lunch in one of the museum’s cafes, I looked over the map. I decided that I would visit the Science Museum’s Clockmakers Gallery, the Scientific Photography exhibition and the Ciphers exhibition.
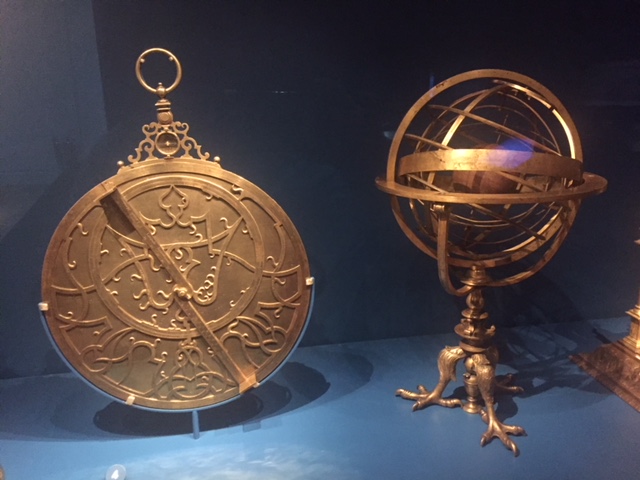
The Clockmakers Gallery
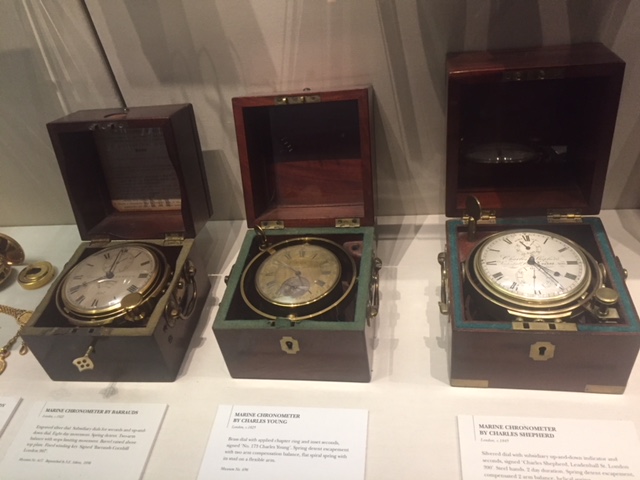
I’ve not been to the Clockmakers Gallery before. It proved fascinating, with lots of different timepieces, starting from the 1500-1600s, to the 1800s. There was an interesting section and exhibits showing the story of the search for Longitude.
The search for Longitude
Longitude was a very important factor that helping ocean navigation and was a search that covered centuries of searching by the best scientific minds.
A competition was held and solutions invited to the problem and prizes offered.
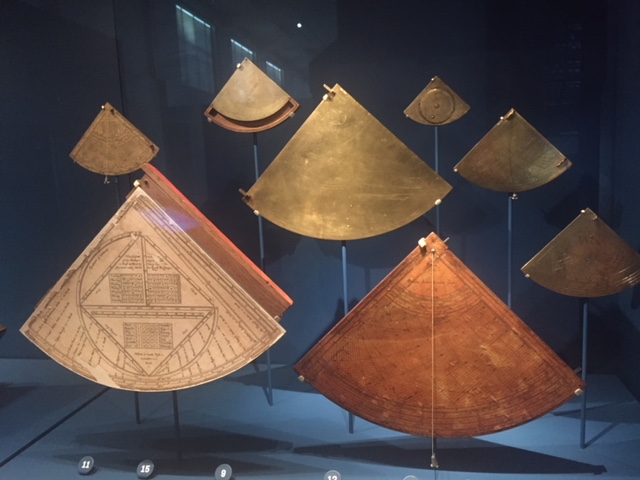
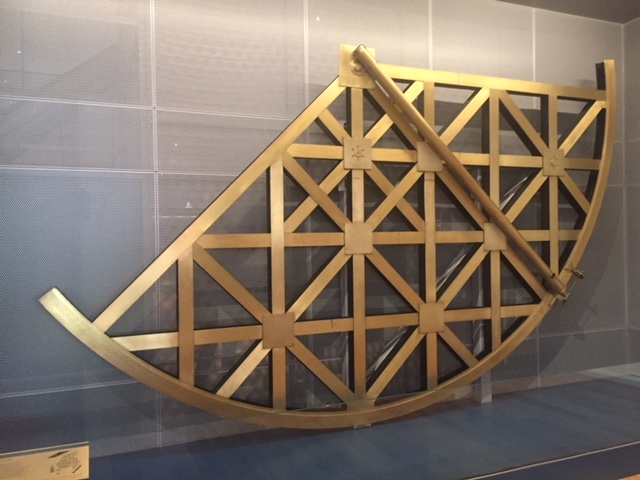
Other instruments
There was also examples of cartographic and scientific instruments. In the early 1600s there was only one instrument maker in the whole of London, but more came from Europe and eventually a Guild was set up to cater for the needs of the craftsmen.
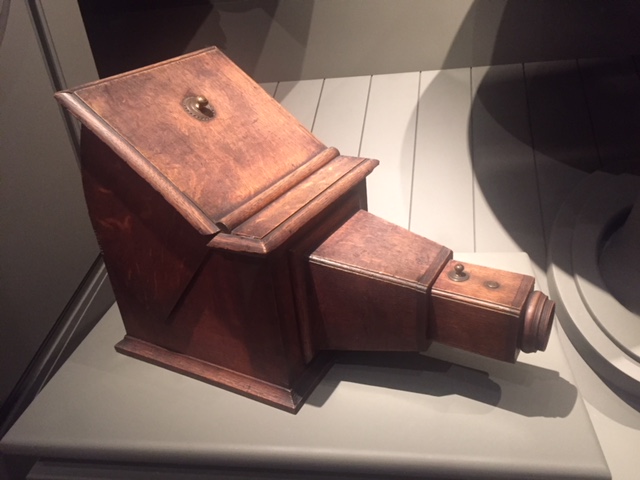
Camera Obscura
The Camera obscura (‘dark room’) projects a reversed and inverted image onto through a small pinhole onto a smooth surface opposite, such as a wall. The surroundings of the projected image needs to be dark so many historical camera obscura experiments were performed in dark rooms.
Later in the 16th century lens were incorporated and became popular with artists in their drawing and painting. In the 19th century the camera obscura transformed into the camera, with the addition of light sensitive paper. Then later colour photography, with the invention of the autochrome by the Lumiere brothers in 1907.
In my first season as a Tudor at Kentwell Hall, I was part of the team that set up the Camera Obscura in the small octagon room on the bridge over the moat. To work effectively all the windows were boarded up to provide a dark environment. Then a lens was installed on the window that over looked the moat. The image was projected on to the opposite wall.
The children found it fascinating to see their classmates up side down on the lawn.
Scientific Photographer of the Year
As a photographer, I like to visit photography exhibitions, to get ideas and see different genres and skills. The Scientific Photographer of the Year exhibition included a range of different images. Some were macro images of insects, plants or minerals. Others were of the natural world, such as the aurora borealis.
They gave a fascinatingly different view into our world.


Exploring Space
I had to go through the Exploring Space section to get to the basement gallery of the Science Museum, where the Ciphers exhibition was. Wanting to save my energy I didn’t spend too much time here (I’m still working on my fitness and have to pace myself). What I did look at was fascinating.
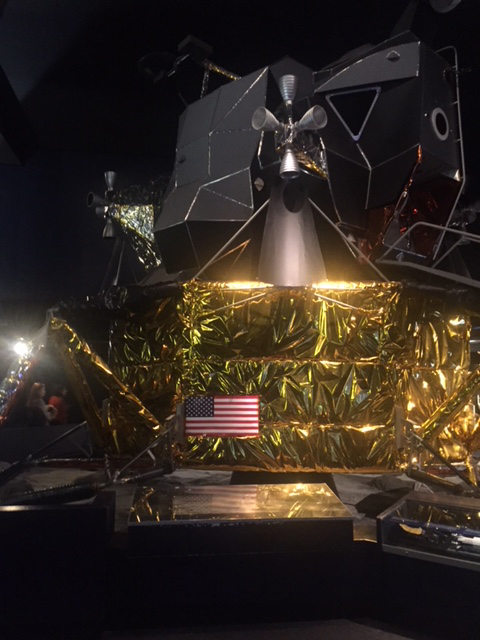
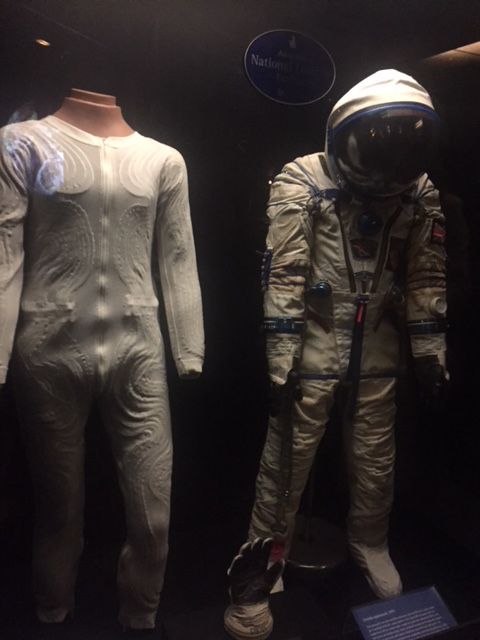
There was the Moon lander, space suits and the under suits that astronauts wear.
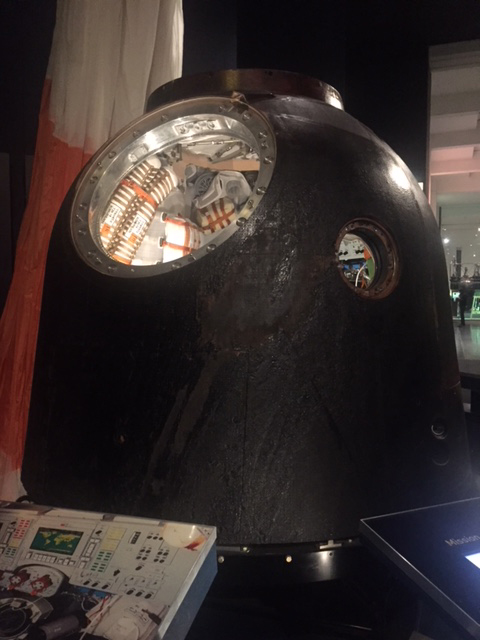
There was one of the rockets, with an open nose cone, hung overhead. You could see what it looked like inside. There was also the Soyuz capsule that Tim Peake went to the International Space Station in. How 3 men fitted in there I don’t know. I would have found it very claustrophobic.
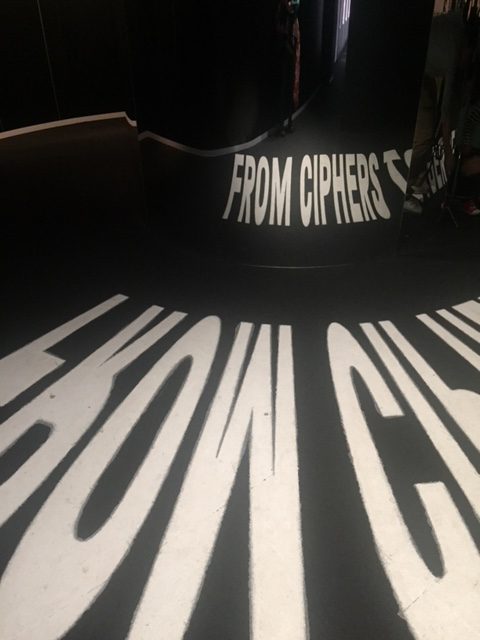
The Ciphers Exhibition
The Ciphers exhibition was intriguing. It started off with words on the floor that reflected in a mirror, showing the title. A timeline showed codes from the Greek and Roman period, to modern times. It also looked at the different types of codes. Some of these were simple letter/word replacement, other were message rolls.
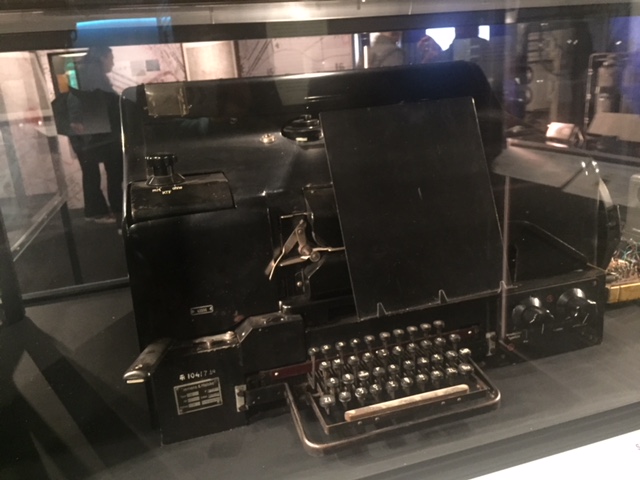
They also had an early version of the Enigma machine and other larger machines.
There was a section on GCHO (Government Communications Head Quarters) and how it helps prevent terrorism. They had a replica of the home made bomb which caused restriction on liquids on flights. The exhibit was made with a soft drinks bottle filled with hydrogen peroxide. The trigger fired by the flash of a disposable camera taped to it. It was scary just how easily accessible these items are.
One exhibit had a live search of twitter mentions of err, arrgh and other innocuous words. Another explored the discovery and capture of a large spy ring in the 1960s.
Learn about some of the benefits of using good design for your heritage venue here.
Being a re-enactor is great fun. So some of my escapades here.
To discuss your creative project requirements call 0775 341 3005 or email info @ iconiccreative.co.uk.

Museum of Richmond – Case study
The Museum of Richmond asked us to create maps and activity sheets to help their visitors find the Museum more easily. They also wanted photography of some of their workshops and of visitors interacting with the Museum and it’s exhibits for them to use in their social media and promotional material.
The Museum of Richmond is situated on the second floor of the Richmond Town Hall. A survey had shown visitors were having trouble finding the site.
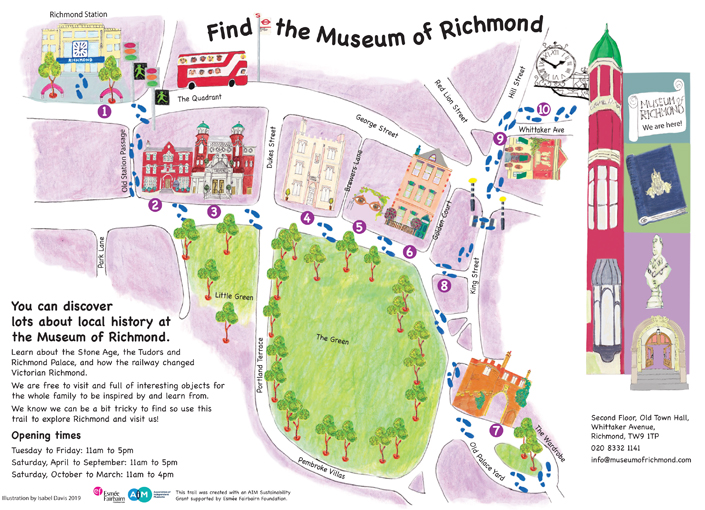
The brief
Our brief was to create 2 A4 maps from the local transport hubs of Richmond Rail Station and Richmond Bus Station, to the Museum. We decided to keep the routes away from the main shopping areas and focus on the more historic sites along the routes.
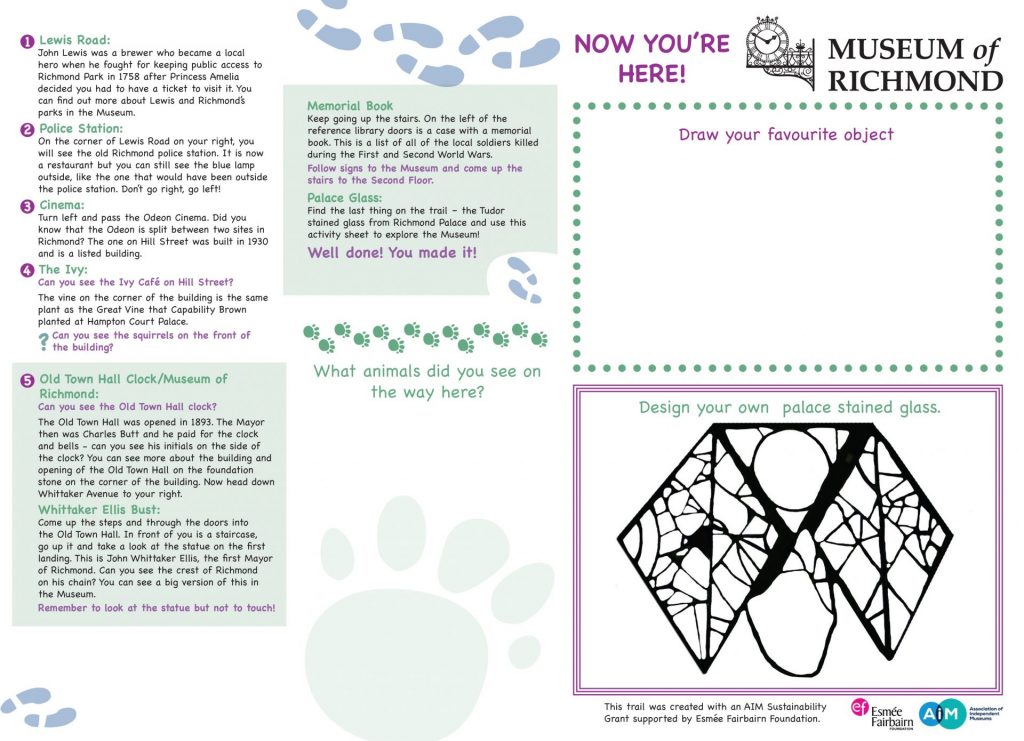
The Museum also asked for activity sheets on the reverse of the maps for children to complete once they’d fond the museum. They wanted to highlighting particular exhibits that the museum.
The Museum of Richmond had recently undergone a large exhibition display refurbishment and also wanted promotional photographs of visitors of all ages creating in workshops and viewing and interacting with the exhibits.
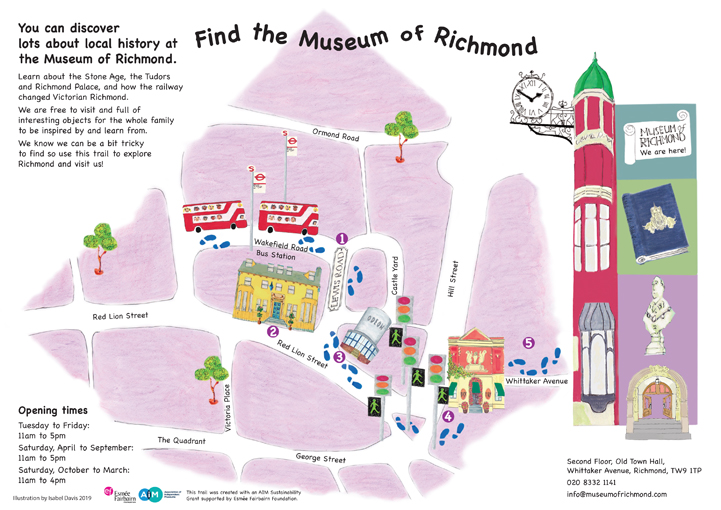
The maps
For the illustrations, we worked with children’s illustrator Isabel Davis (https://www.instagram.com/izzypigeonscratch/). A list of venues to be included on each map was drawn up. Isabel then did a reccie trip to create sketches of those sites.
She then created an initial draft of the map. Some elements were removed or increased in size to make things clearer. We then created a new draft, which was then approved.
The activity sheets
It was decided to keep the activity sheets similar in style, with a snippet of information. Occasional questions about each site on the map were also included. We provided a space for children to draw their favourite item. The Museum of Richmond’s favourite item is the glass from Richmond Palace. We created a version for the children to colour in.
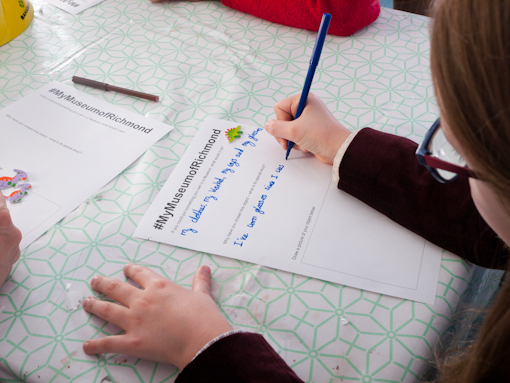
The photography
The Museum of Richmond asked some of it’s regular visitors to help them. Schoolchildren and families took valuable time out of their half term holiday to come along.
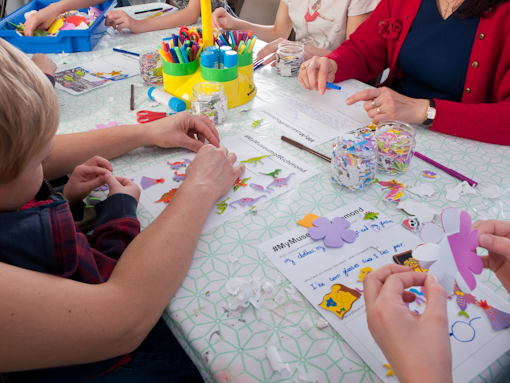
I brought along all my studio lighting. Getting all that equipment up and down two flights of stairs was a mammoth task. Using the theme and hashtag #MyMuseumofRichmond the children and visitors had great fun in the create workshop.
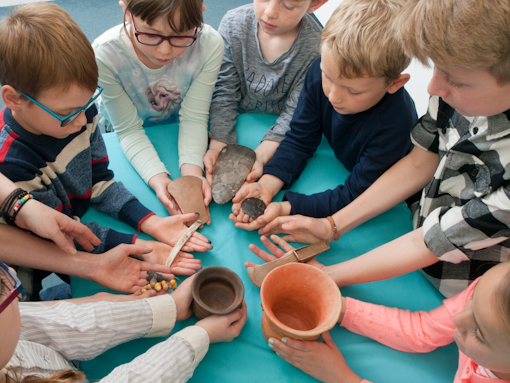
I then worked with some of the adult visitors to photograph them looking at the exhibits. Lastly, museum staff organised a handling session for the children. They were able to touch replicas of many of the artefacts that the museum holds.
The result
The Museum really loved the maps, activity sheets and photography that we created for them. Footfall increased and visitors commented that it was now easier for them to find the Museum.
Do you feel you aren’t creative? Here are some tips to help you.
Learn about some of the benefits of using good design here.
To discuss your creative project requirements call 0775 341 3005 or email info @ iconiccreative.co.uk.

Blists Hill – My Top 10 Heritage Sites – No 10
Blists Hill Victorian Village – Iron Bridge
I visited Blists Hill Victorian Village once as a child and have isolated memories of the chips in the Victorian ‘chippy’ and the fairground rides, but not much else. But I do remember being left with the feeling ‘I must go back some day’.
Drawing up the 10 Ten list
When I drew up my Top 10 list for this series of blogs, Blists Hill immediately popped into my head as a place to revisit and explore for a blog post. So I booked my train ticket and an overnight stay in the Coalport YHA.


Having been working with a trainer for a year to improve my mobility and flexibility, this would be the first long distance trip with just my walking stick. I travelled light with just a rucksack, my camera and microphone, undies and a change of clothes.
The journey
Awake since 2.30am (2 hours before my alarm – I wasn’t best pleased to say the least), I got to Euston very early. It’s amazing who you can get chatting to on journeys and on this occasion it turned out to be one of the Liberty team – yes that Liberty. We chatted about the store, it’s history, the TV program and the architecture. A great start to my journey.


I arrived at a very grey, windswept Telford Central and got a taxi to Blists Hill, arriving just as it opened.
Testing the new camera
One of the reasons I’d booked this trip was to try out my new camera. It does both stills and video and I felt that Blists Hill would be the ideal place to test it. This proved to be the case, with challenging light conditions both inside and out.


Getting my ‘readies’ at the Blists Hill bank
My first stop was the Bank, to change my modern money into facsimile Victorian pennies, ha’pennies, thru’pennies and farthings. I felt like I was walking into Gringotts bank, with the old wooden counters, decorative railings and even a period Bank manager.
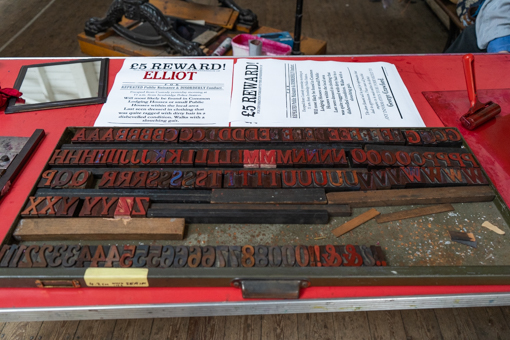
Weighed down with unfamiliar coins and burning a hole in my pocket, I headed off to the printer – a bit of a busman’s (or woman’s) holiday. On my first design course, I learnt how to set type the old fashioned way, with wooden and metal type blocks. We set a poster and then had to separate them out manually into 2 different colours: red and black. At Blists Hill I just set my name and operated the printing press to print my own poster.
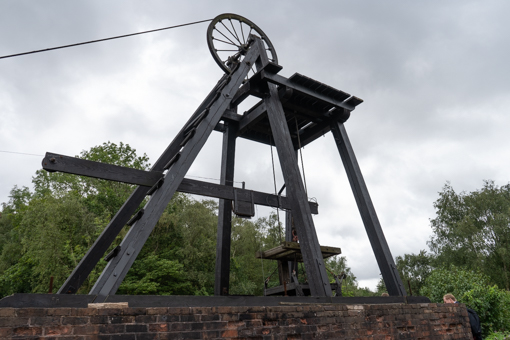
A very informative tour was next, given by the grocer. This took us to an original mine shaft, the canal and cottages.
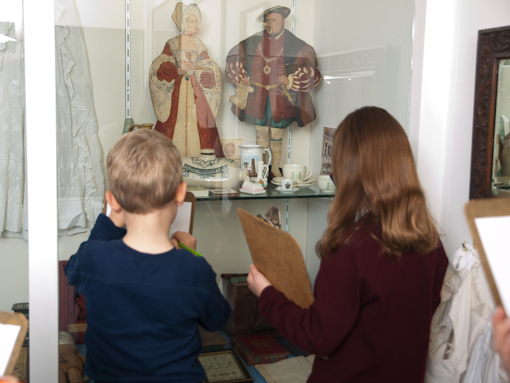
Walking past the baker (who had just put their bake in the oven, much to our chargrin), we arrived at the school, just in time for the lesson. What an interesting experience.
The school lesson
The re-enactor playing the schoolmaster was fabulous. He was strict, he had even the adults standing, sitting and saying ‘Yes Sir’. He even played the piano/harmonium and led everyone in renditions of All Things Bright and Beautiful and God Save the Queen.
A quick lunch of a delicious home made scotch egg gave me chance to sit and rest my sore back. That’s one of the drawbacks of this site, not enough seats under cover (it rained a lot) for people with mobility issues to use.
Wandering slowly back up the kill, I popped into the bakers to see if their bake was now out of the oven. I was lucky, it was, stocking up on a lovely fruit bun and a huge chunk of shortbread, both of which I saved to eat on the train home.


The photographer’s studio at Blists Hill – a busman’s holiday
Popping in to the photographer’s studio, it felt like a home from home. My father was a photographer. At one time worked for Lord Snowden and the BBC. He collected vintage cameras. His collection included old plate cameras. I saw several of which I saw around the studio in Blists Hill.
In the 1800-1900s studio photography was lit with natural light, therefore long exposures were needed. Sitters had to remain still for quite a long time so the image wasn’t blurry.


Loving the lace at Blists Hill
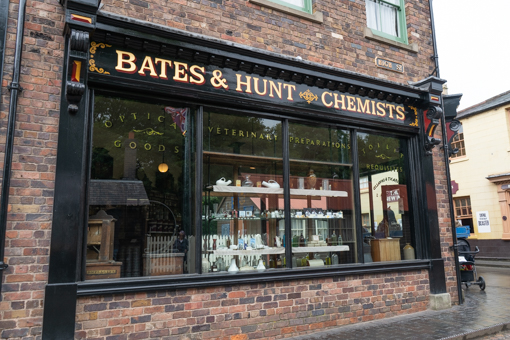
I popped into the carpenter’s and the blacksmith’s, the chemist and the haberdashers. There was a beautiful collection of lace items and I rushed down to see the lacemaker. I used to do lace making as a hobby and I enjoyed watching a skilled practitioner.
Blists Hill was built in 1973 and is built on the site of a former industrial complex in Telford, Shropshire. The museum recreates the sights, sounds and smells of a Victorian Shropshire town. It’s set in the late 19th and early 20th centuries. There wasn’t originally a village on the site. However an amazing village atmosphere has been created. It’s a fabulous day out for everyone. There are lots of different exciting things to see and do, like horse carriage and fairground rides.
Would I go back again? Yes. Would I love to work with them? Definitely.
The story behind my short film What did you do in the war Grandad?
Tips to help you make short films on a budget.
To discuss your creative project requirements call 0775 341 3005 or email info @ iconiccreative.co.uk.
