

Better Photography 101 – Part 2 – Camera tools
Camera tools (for DSLR)
 All DSLR cameras have tools which allow YOU to choose determine how you create your image. YOU are in control. By changing each tool, YOU can change how YOUR final image looks.
ISO – this is the sensitivity of the film (ASA in the ‘old days’) and now the sensor in digital cameras
Camera settings

Camera settings ISO/ASA
Use different values for this depending on the light conditions ie if it is bright sunlight set the ISO to 100 (and close the aperture to f22 – ‘stop down’), but if you’re shooting inside or on a darker day increase the ISO to 800 or above so that you capture more light. There are drawbacks however. The larger the ISO number the more ‘noise’ is introduced into the image.
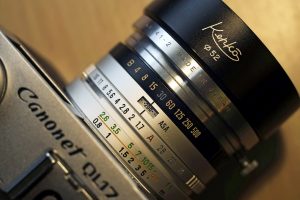
The close up of this old film camera shows 200 ASA. It would change depending on what film you put in the camera. Digital cameras allow you to change the ISO to suit the conditions, but they still relate to how film sensitivity worked. 100 ISO is used in bright light and in studio flash situations. 200-400 ISO in more over cast situations. Higher ISOs such as 1600, 3200, can be used in really dark conditions, but create more ‘noise’.
Light is one of the main tools of photography
Light – what is available to you: natural light, sun light, ambient lighting, or photographic lights
Photography translates as drawing with light, so light is a key tool. By knowing how to control light you can really improve your photos
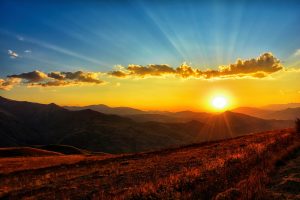
Natural light is the main one that most people would use. On a sunny day the light can be very harsh, with strong directional shadows. Even these out by using an extra light source in the form of a flash or a reflector. These don’t always have to be expensive, sometimes a sheet of white paper, or a white sheet can be used. Even a white wall can act as a reflector.
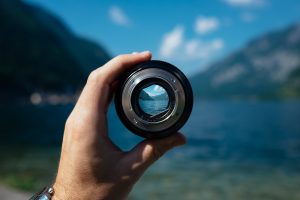
The aperture allows you control how much light enters the camera
Aperture/F stop – This tool is the lens opening on your camera that lets light through onto the film or the digital sensor. YOU can change it to allow different amounts of light through.
An open aperture lets in lots of light, a smaller aperture lets in less light. This is also a way of creating depth of field. A large aperture creates a soft, out of focus effect. If you focus on a foreground image, the background will go out of focus.
To create a sharp area through more of your image, use a smaller aperture (larger f/stop number).

Slow shutter speed with an f22 aperture

Aperture chart – the larger the number, the smaller the hole
F/stops range from f1.4 through to f22. Combining a slow shutter speed (see above) with f22 creates lovely light flares.
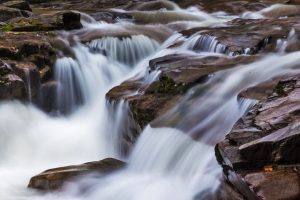
A slow shutter speed can be used to create dreamlike water effects
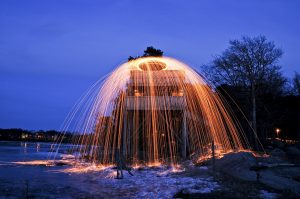
A slow shutter speed can be used to create amazing light trails
Shutter speed – This is how fast the shutter moves and how long the sensor is exposed for.
A slow shutter speed exposes the sensor for a long time, a faster shutter speed exposes the sensor for a shorter time. This gives you a great tool to create fantastic effects.
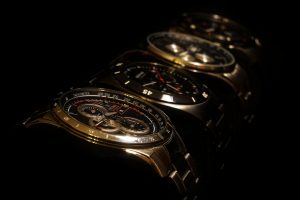
Low light product shot
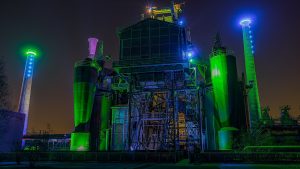
Night shot showing lights
Slow shutter speed
Using slower shutter speed is a great tool that lets you create dreamy waterfalls, or seascapes, stunning lights trails and amazing low light imagery and night photography. Use a tripod if the shutter speed drops below 1/125 to stop camera shake.
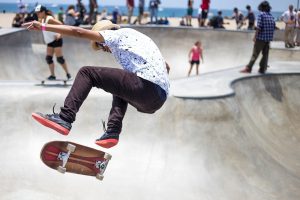
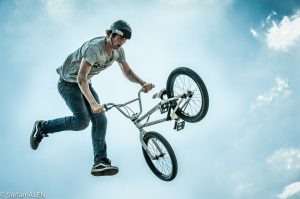
Fast shutter speed
A faster speed is a great tool to use to allow you to freeze motion. This is good for sports photography and other instances where the image content needs to be sharp.
Each tool affects the other. Knowing how to balance and manipulate them to create amazing images takes practise and can really improve your photography.
Learn why cropping your photos is a great way to improve them.
Check out part 1 of the Better Photography 101 series about your intent behind your photos
Check out some of my previous work at www.iconiccreative.co.uk
To find out how I can help you create atmospheric portraits, or event coverage, call me on 0775 341 3005 or email info@iconiccreative.co.uk
