

Victoria and Albert Museum – My Top Ten Heritage Sites – No 9
The Victoria and Albert Museum
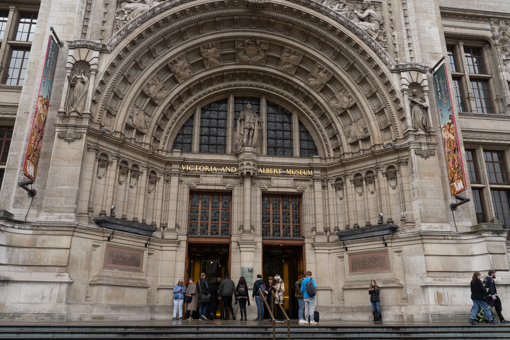
The Victoria and Albert Museum
The world famous and world renowned Victoria and Albert Museum in South Kensington, is the leading art and design museum in the world. It’s home to work by the some of the greatest crafts people from around the world, all under one roof.
My crafts
I’m very good at crafts. I’ve tried many over the years. I came top in metal work at school and also did woodwork, and hot and cold enamelling. I’ve done macrame, lace making, batik painting, costume making, photography (obvs), drawing and painting, pottery, jewellery making, narl binding (viking crochet), crochet, DIY, cooking & baking. In fact I can usually turn my hand to most crafts and produce a reasonable result with little training.
I love visiting the Victoria and Albert Museum for inspiration. There is so much to see that it can be over whelming when you first walk in. Where do you start? Yesterday I came in via the underground tunnel from South Ken station, so came into the museum on the ground floor sculpture area, near the semi permanent exhibition space. Currently it’s showing an exhibition of Mary Quant design classics. I wanted to see other pieces yesterday so left this exhibition for another time. But from the little I could see when I was in the upper galleries, it looks very interesting.
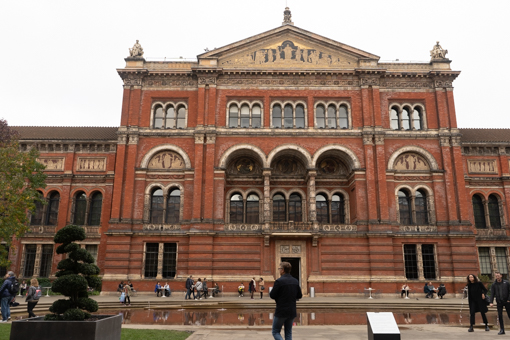
I decided to take an early lunch so had a salad in the cafe in the outside square, as it wasn’t too cold. As a Londoner and regular visitor to the Victoria and Albert Museum you can take for granted just how impressive and ornate the building is, forgetting that for visitors like the couple I was sat next to who were talking about it, it’s very awe inspiring and over whelming. As a museum for design and craft, it certainly walks the walk and talks the talk.
The sculpture galleries


I wandered up to the sculpture gallery, not somewhere I’ve been before. The first thing I saw was an amazing wooden carving – see photo gallery. I loved how intricate it is. Then I saw a beautiful shell carving. The subtlety in both carvings was stunning.
The Cast Courts
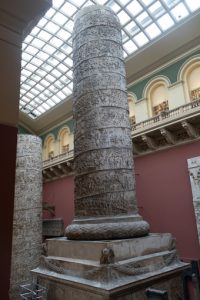
On each side of the gallery are the Cast Courts. These house casts of existing sculptures. The pieces that really blew my mind were the two tall columns, intricately decorated with carving in a spiral all the way up.
The ironwork gallery


Then I wandered along into the Ironwork gallery where they had wrought iron pieces from modern to medieval. I was particularly take with a beautiful black rose and a gate that had a skull in the middle of it. Very appropriate given that we’ve just celebrated Halloween.
The jewellery gallery


The Silverwork gallery
To get to the silver work gallery I had to retrace my steps through the ironwork gallery and then go through the jewellery section. I didn’t want to get too distracted by all the bling (of which there is a lot), so just whizzed through that fairly fast. But I did get sidetracked by a couple of pieces 🙂


Through the miniatures section (pictures by famous miniaturist Nicholas Hilliard), then through into the silver work gallery. All that glitters isn’t always gold. Sometimes it’s silver too. At one point I did look at taking up silver smithing as a hobby, but it proved too expensive. Now I just admire all the shiny bling 🙂
The shop at the Victoria and Albert Museum
Then it was a quick tour of the shop. This is where I got some of the reference material I used when I was rebranding a couple of years ago. They had some lovely peacock items in then, which inspired me. Once again all the gifts, books and items were beautifully designed and I was seriously tempted.
If you’ve ever felt that you weren’t creative here are a few tips to help you.
Learn about some of the benefits of using good design here.
To discuss your creative project requirements call 0775 341 3005 or email info @ iconiccreative.co.uk.

The joys of being a historical re-enactor
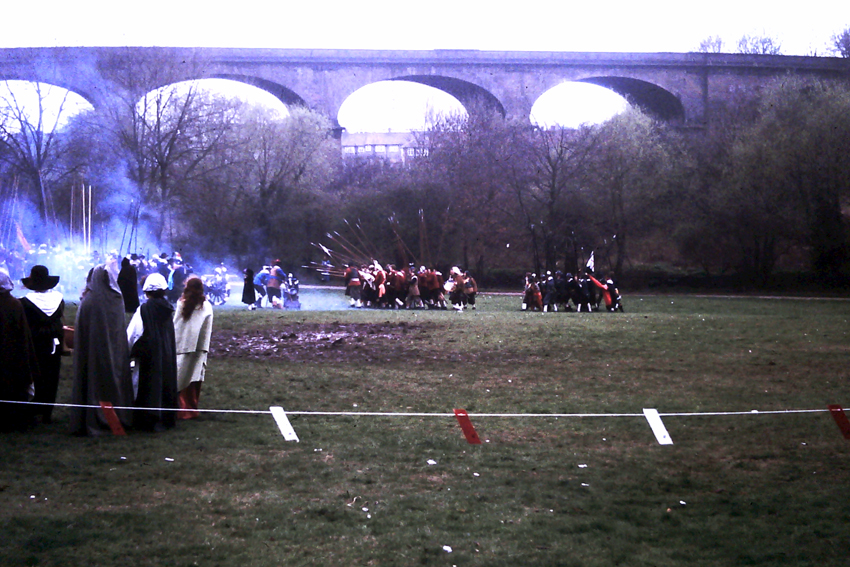
As a child I saw a battle re-enactment in my local park, but had never heard of the phrase “re-enactor”. It was a civil war re-enactment, recreating the Battle of Brentford. There was a whole encampment with fires, tents, and cooking, as well as the canons, muskets and pikemen.
I found it fascinating. I’d always loved history, but had only ever seen it in books or museums, never in ‘real life’ as it were. I really wanted to give it a go, but it wasn’t until about 10 years later that I got my chance.
Meeting the Dark Ages Society
Some friends and I went to a Medieval Fayre in Woodmansterne. It was fancy dress and we all dressed up as well. A friend went as a princess/lady and I went as her Matron. Another female friend also went as a lady and our male friends dressed as peasants, in old post office sacks.
During the Fayre a group called the Dark Ages Society gave a fighting display which was great fun to watch. After the display some of the members came over and talked to our group and they invited us to their next weekend event.

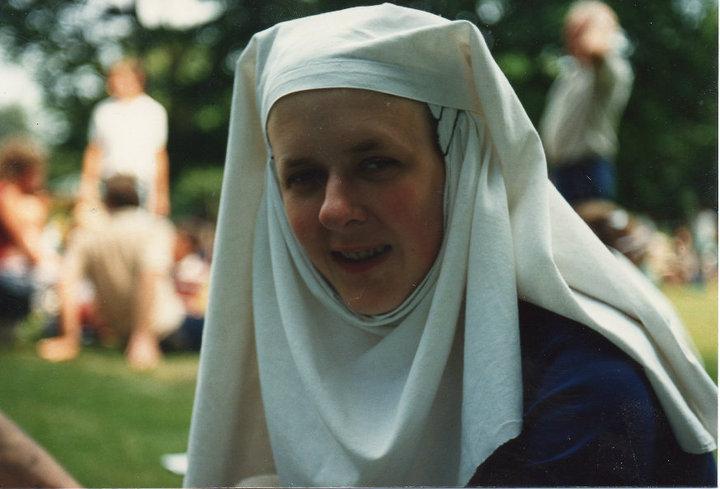
This was my chance and I took them up on their offer and became a viking re-enactor. My first weekend took place at Cadbury hillfort and I loved it. Although I wasn’t able to fight during the day, it was fun to watching the fighting and then there was a banquet in the evening, in candlelight, which made it feel very magical.


Becoming a viking re-enactor
Joining the society, I had a great time for the next 16 years, eventually becoming a unit officer. I fought with a spear and shield and later with a 2 handed spear and scramascaex (short knife). Organising weekends was fun, I even cooked a banquet on an open fire for nearly 40 people.


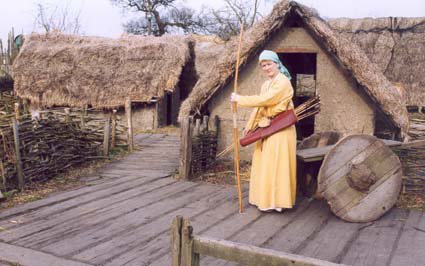
Tudor re-enactor at Kentwell Hall, Long Melford, Suffolk
However I had to give it up for health reasons and had to look elsewhere for my new re-enactor kicks, which turned out to be at Kentwell Hall in Suffolk. Kentwell Hall is a Tudor hall and they do a lot of educational work for schools. The host large numbers of volunteer re-enactors for all areas of the house, from lords and ladies, to dairymaids, bakers, painters, blacksmiths, circus entertainers and lots of other characters.
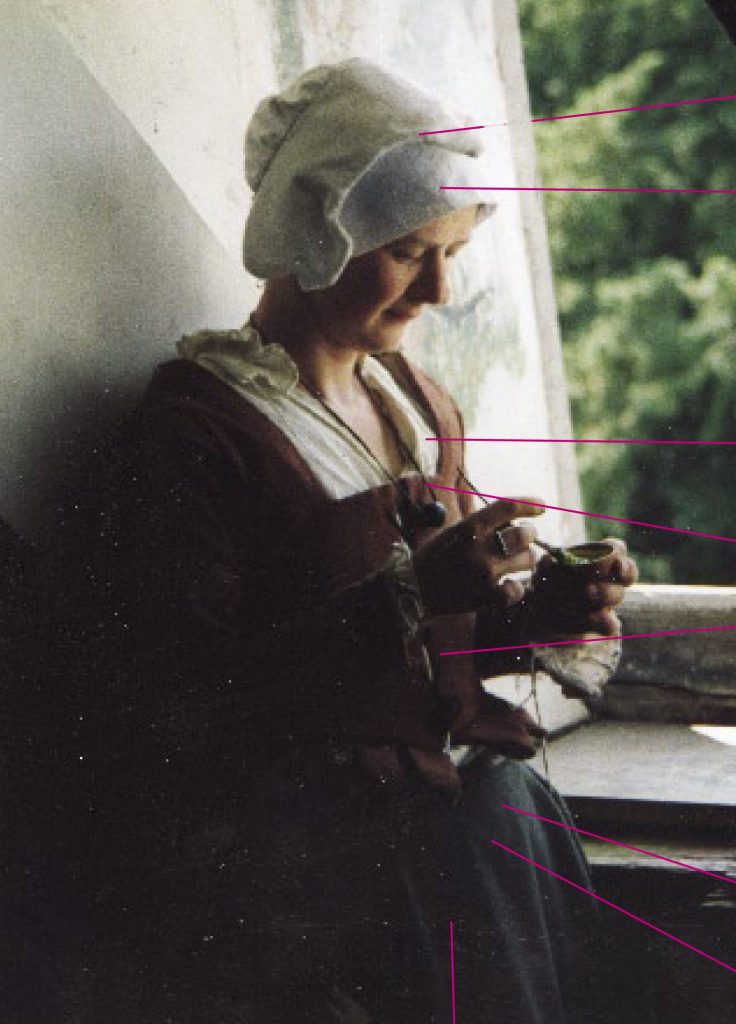
We made our own costumes from patterns that we also made ourselves after costume sessions from their head seamstress. In the photo above I’m wearing a fully lined and hand finished skirt, fully lined, boned and hand finished bodice, underdress, and hand sewn headpieces and apron. The only thing I didn’t make were my period shoes.


")
“Kentwellese”, was the language, which was a psuedo type of Tudor speech that allowed us to talk about modern things but in a way that the visitor wouldn’t always understand. During the day the house and grounds were open to school children, at the weekends it was open to visitors, but in the evening it was all ours and we had a great time.
The King’s Army
Whilst I didn’t actually join the group and become a civil war re-enactor, I also spent a weekend with the civil war era King’s Army re-enactment group at Bolsover Castle.


I loved heritage and history enough to complete a Post Graduate Diploma in Heritage Interpretation and wrote about re-enactment and living history for my dissertation. Re-enactment, of any period and living history can be a fun day out for visitors to historic venues and locations, but it can also be a fantastic way to discover more about how people lived in the past.
I’m now exploring the past through filming making
The story behind my short film What did you do in the war Grandad?
Tips to help you make short films on a budget.
To discuss your creative project requirements call 0775 341 3005 or email info @ iconiccreative.co.uk.

TV & film extra – a day in the life of
Have you ever wanted to be in the movies? Have you wondered what it’s like to be on a film set?
You can. By becoming a TV & film extra.
Over the last few years, as well as making my own films, and working on some indie film sets, I’ve also done a little bit of TV/films work by being a TV & film extra. I joined two extras agencies and still get requests from the casting people. One of those agencies is Universal Extras.
Below I talk about what each job was like, to give you an idea of what it was like.
The Cult Member
In 2015 I did a film shoot Carmel College, Wallingford in Oxford. I had to be on set for 6am as they had over 50 TV & film extras to make up. This meant getting up at 4am for the drive to the site.
Once we’d arrived, we had breakfast, provided by onsite caterers. Whilst that was happening, the make up people started to make up each person. Runners also sorted out our costumes. Making up 50 TV & film extras takes a long time. It wasn’t until about 8am, that we were nearly ready to shoot.
But before that, we had to be issued with weapons, replica weapons. Even replica weapons can be dangerous and we had to sign each weapon out and it was stressed to us that if any one messed around with the guns, they would immediately be sacked and escorted off the shoot.
The location
Our location for the filming was an amazing amphitheatre in the grounds of Carmel College in Wallingford.
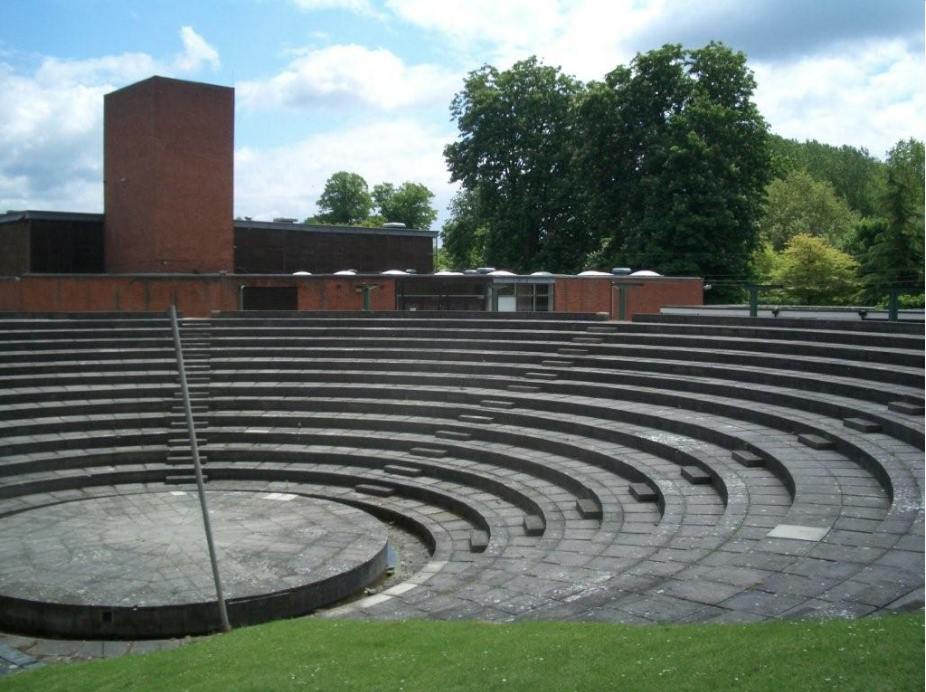
All the extras had to sit in one wedge of the circle. We had to shout/chant a particular phrase, in response to the lead character who was speaking in the centre of the amphitheatre. Once the director was happy with that take, we then had to move around to a new wedge and in different positions. We then had to repeat the shouting/chanting. Once that take was deemed ok, we then had to move again to a new wedge, and again shout the same phrase.
There was a reason this was done in this way. In post production all the different takes would be tiled together to create a huge crowd.
It was a lovely warm morning. We were sitting down in the sunshine. The director was happy with what had been shot. We were released home at lunchtime. Not a bad way to spend the day and also get paid for it 🙂
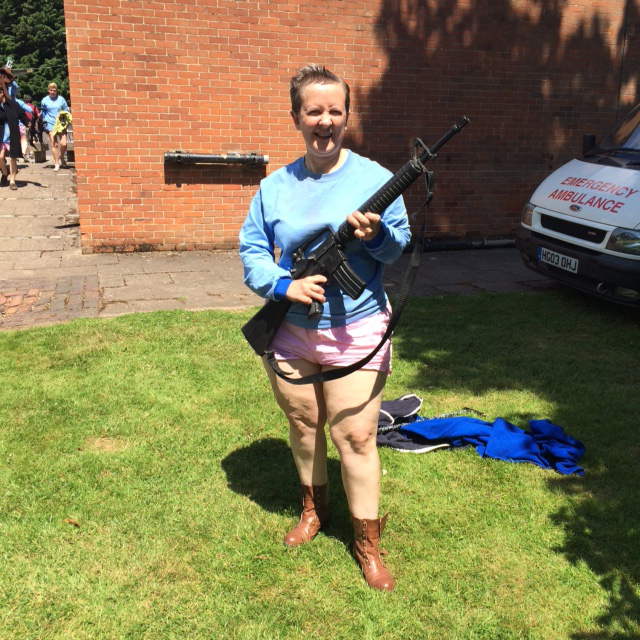
Before I drove home I asked the makeup ladies to do something with my hair so it wasn’t quite so ‘dramatic’ 🙂
The viking
For 16 years I was a viking re-enactor, fighting at weekends and giving fight displays. Occasionally we also did some film work. One project I remember included a storyline that a spaceship appeared over our fighting and frightened us all. Not sure how authenticate that was 🙂
My key memory of that shoot, was fighting against one of our members called Wolf (we took on character names). He was one of the founders of our society. He was a fantastic swordsman. Because of the need for consistency we had to do the same fighting movements several times. It was exhausting, so I just ‘opened’ my defences each time and let him ‘kill me’.
The bus passenger
Another job that I remember is an ad for Sky. They wanted extras to act as bus passengers. We just wore our normal everyday clothes.
I initially went to put a basic winter coat on as the shoot was in winter. But then I thought that, to catch the director’s eye, it might be better to wear something more eye catching. So I wore my brown leather trench coat and trendy cap. It worked. The director put me at the front of the bus.
They had hired a bus for the shoot and the location was a nearby green. They filmed from a variety of angles inside and outside the bus, just going round the square repeatedly. Sitting next to a chap and we looked at the same magazine, pointing things out, as part of our little back story, making sure we did the same thing for each take.
I don’t remember any catering on this shoot. But I do remember it being really cold, and standing out on the green, whilst they shot inside the bus, wasn’t pleasant.
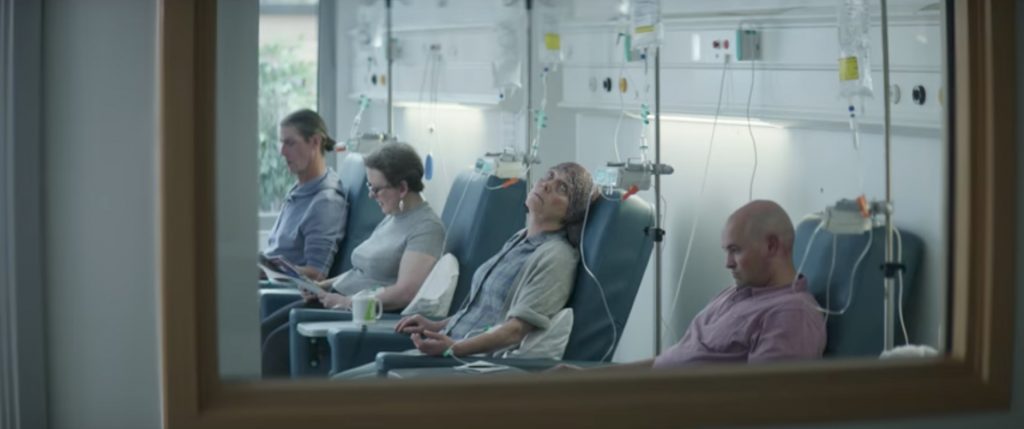
The cancer patient
A more thought provoking job involved the recent ads for Macmillan Cancer Support. This was actually shot in a hospital in west London. I can’t remember exactly which one.
I arrived early in the morning as requested. As on most shoots there was catering: breakfast, tea, coffee and juices etc. There was also a crew bus which was an actual double decker bus.
The crew bus
We spent most of the morning in the crew bus. Only a few of us were used at a time. Waiting is a big part of an extra’s life. In fact it’s a big part of filmmaking in general. Some people like to read, others like to chat and it’s a great way to meet people and make connections. Talking of connections, the thin chap in the photo below has done lots of extras work. He was one of the aliens in the Star Wars films.
After (the fantastic) lunch a few of us still hadn’t been ‘used’ and we were still waiting. By mid afternoon, we were still waiting and we were beginning to wonder if we would actually be used. Eventually the runner came to us and asked to come to the area in the hospital where they were filming.
The 2nd unit
We spent some time in a side room. While we were in there the 2nd unit director and his team came in to film what are called ‘cutaways’. These are clips such as a clock, or papers on a desk. These are cut into the main edit at the post production stage.
Finally we were asked to come through to the main shoot area. They asked us to sit in the patient chairs, depending on the colour of our clothing. They set us up with drips, not real drips but mocked up to look like a real drip. The scene was also ‘branded’ and staged by the placement of Macmillan products. They used items such as mugs (as you can see on the picture below). Finally they did one take. And that was it. All over. As the waiting had gone over the time we’d been hired for, I actually got paid extra time, which was even better.
The story behind my short film What did you do in the war Grandad?
Tips to help you make short films on a budget.
To discuss your creative project requirements call 0775 341 3005 or email info @ iconiccreative.co.uk.

Katherine Buchan Meadow interpretative panel
Case Study
The Katherine Buchan Meadow panel project
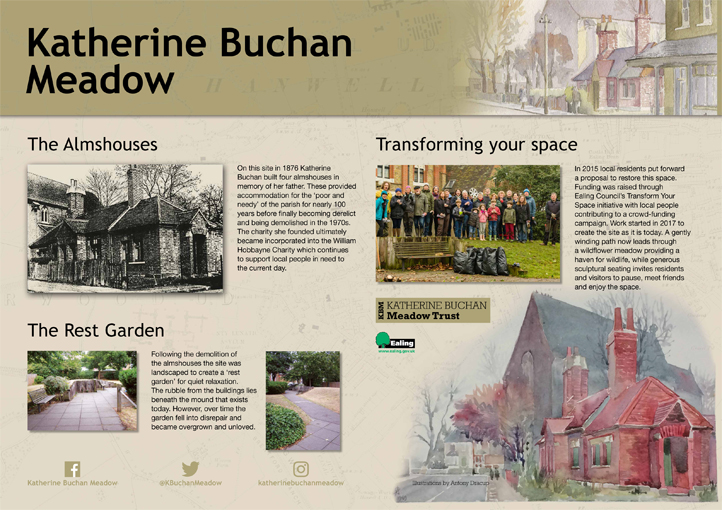
Over the last couple of months I’ve been working with the Katherine Buchan Meadow Trust. They wanted to design an interpretative panel for a small community green space near where I live. Working with the head of the trust, we developed the idea and exactly what they wanted on the panel.
The local newspaper covered the project here, when it was initially planned.
Almshouses and rest garden
The area was originally the site of 4 Almshouses. They were built by local resident Katherine Buchan in memory of her father. The cottages provided housing for the poor in the borough of Hanwell. The houses were later demolished and the site made into a rest garden. When Katherine died the area became part of the William Hobbayne charity. On his death in 1484 Hobbayne endowed this charity to help local residents.
Working with the local school children
We worked with the children from the nearby school. This is sited on one side of the meadow. They researched the history of the site. We also developed illustrations showing the flora and fauna of the site, to add to further panels. These will be designed soon. The main panel shows the history of the site, how it looked before the works and how the project obtained it’s funding.
The design
In the 1960s a local artist painted the Almshouses as part of a larger body of work showcasing Hanwell locations. His son let us use his father’s watercolours of the Almshouses as a key focus of the panel. To enhance the cohesive feel of the panel I colour picked tones from the original watercolours. I used these for the heading area behind the title and background. This also helped give the panel a heritage feel.
Searching online, we found the National Archive of Scotland map archive had an 18th century map of the area. We felt this would give the map historical resonance, as the Meadow is situated in the old part of Hanwell.
We purchased a high resolution copy to ensure it would print correctly as the panel is A1 size. As I dropped the map into the artwork file, the word HANWELL on the map lined almost exactly with the heading of the panel. Very fortuitous and I tweaked it only a little to ensure it lined up properly. 🙂
Black and white photos
The children from the school discovered black and white photos of the Almshouses in the Local History section of the library. To ensure these printed properly at full resolution, I had to photograph the black and white photos, rather than use the library copy facilities.
Discovery of the stag beetles
In one of the early versions of the design, I incorporated several photos of the progress of the project. These ranged from the landscaping, when the earlier rest garden elements were removed, throughout the discovery of stag beetles on the site and the creation of the staggery, and the unveiling early last year. In the end it was decided to only show two photos of how the rest garden had previously looked and one of the team who worked on the project.
I also created a basic logo for the Trust to brand it. This may change at a later date.
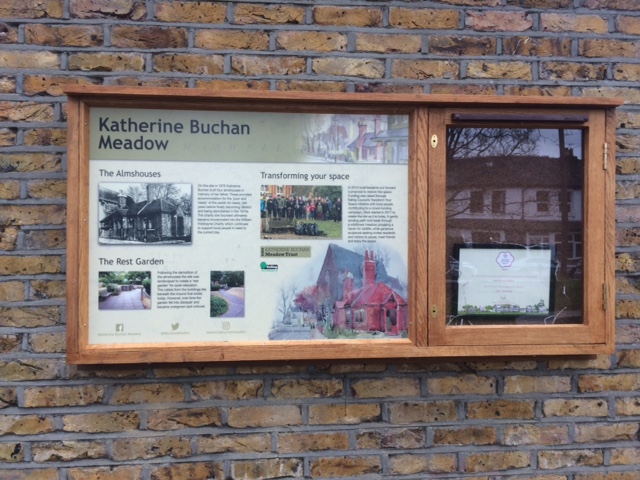
The finished panel
The job went to print in November 2018. It was installed on 16 December 2018 at a community Christmas party and carol singing on the Meadow. The site has won a green flag award. The other signs, showing the flora and fauna, as well as the staggery, will be designed later this year.

If you’ve ever felt that you weren’t creative here are a few tips to help you.
Learn about some of the benefits of using good design here.
To discuss your creative project requirements call 0775 341 3005 or email info @ iconiccreative.co.uk.

How to be Creative

How to be Creative
How to be Creative
“Creativity is just connecting things. When you ask creative people how they did something, they feel a little guilty because they didn’t really do it, they just saw something. It seemed obvious to them after a while. That’s because they were able to connect experiences they’ve had and synthesise new things. ” – Steve Jobs
A definition of creativity could be the “capability or act of conceiving something original or unusual”.
Goran @ AltusHost describes creativity as the ‘ability to look at your surroundings and the tools at hand, then harness them in a way that is novel, unique and has the capacity to be made real.”

Fibonacci – how to be creative
This I personally think this definition is far more accurate, for me any way. We are all creative beings, it’s in our nature. An architect creates a building, first in their mind’s eye, then as a physical item. Children create spontaneous games, stories, toys and models. Chefs create gastronomic wizardry, mathematicians work with numbers to create and solve numerals sequences such as the fibonacci sequence, and the Golden section has been utilised in nature, art, geometry, architecture and music.
Creativity is the solving of a problem, through being open to other influences and thought patterns and channeling them into a physical or thought form. The Guardian states that “Creativity is all about finding links between apparently unrelated situations”, or as Goran says in the link above, “creativity is a form of analogical reasoning.” Spiritually, creativity is life, the pure creative energy that runs through us all, and throughout the universe.
It is outside opinions, from our families, siblings, teachers, colleagues that tell us we’re not creative. If we get told this often enough we start to believe it. This shuts us down to the creative universal life force and stops us listening and looking and being open to ideas.
Here are some tips to help develop your creativity (in no particular order)
Understand the problem
Particularly in a business situation, understanding exactly what the problem is, can help get the thinking and creative process working.

Look & observe – how to be creative
Look/observe
Look around you with open eyes, with an open mind and with curiosity and wonder. Don’t judge. Be open minded. Look for potential.
Think
As with looking and observing, think without filters. Be open to new ideas and concepts, even if you disagree with them, they can still provide creative inspiration.
Collect
Collect things that uplift you, inspire you and can be used as reference. When I was at art college we were encouraged to collect images from magazines, leaflets, logos and other things to provide inspiration. With the internet, and platforms such as Pinterest, this is so much easier. But it’s still good to have physical, tangible things to help spark inspiration.
Read
Be eclectic in your reading. Be interested in lots of different things. Learn as much as you can about lots of things. This gives your brain lots of new material to work with and helps spark new ideas.

Ask – how to be creative
Interests
Most people have one or two things that they’re interested which is good. But by having lots of interests, researching and learning about them, gives you a broader range of information to work with, which again helps to spark new ideas.
Ask questions
Question everything. Question your perceptions. Ask new and/or different questions.
Use what you know
Use what you know and bring in influences and ideas from other areas – create a ‘creative mixing and blending’ of ideas through what you know from one area and what you’ve seen somewhere else.

Lightbulb – how to be creative
Experiment
Don’t be put off if your project doesn’t work the first time. Eddison made 1,000 attempts to create his lightbulb, before finding success. Try and try again. Each time you will learn more about what you’re trying to create. You will learn what works and what doesn’t, so that your next attempt will include the lessons you’ve learnt and be better for it.
Don’t get het up on your project having to be perfect. It’s better to actually start something and be able to develop it, than to not start because you’re so constrained by perfectionism.
Be open
Be open to risk and trying new things. If your mind is closed and you’re not prepared to try and investigate anything new, you’re unlikely to come up with an inspired ideas or inventions. The more open you are, the more you’re like to see opportunities and the more like inspiration is likely to strike.
Be highly motivated and passionate
What you put in, you get out. So your efforts are lacklustre and half hearted, the resulting project will reflect that. The more passionate you are, the more effort, excitement and passion you put into your idea, the more your body and mind will respond to that and the more likely inspiration will strike, providing you lots of creative options to pick from.

Mind word cloud – how to be creative
Be confident in yourself and your idea
Don’t let criticism from others put you off. There is constructive criticism and negative criticism, one helps build and the other knocks you down. Search out people who’s opinion you respect and ask for input and feedback. You don’t have to implement their suggestions, but they provide a new perspective and can act as jump start to take your idea even further than you might have achieved on your own.
Ignore the negative criticism and don’t let it crush your ideas and your dreams. Lots of people are negative because they’re scared to see others doing well, as often they have given up on their ideas and dreams.
Spend time alone and in quiet
We’re bombarded by so much input these days, from TV, radio, adverts ipods, Spotify and other music streaming options, wifi signals, phones, texting etc etc. This is almost an overload situation. Learning to spend time alone, and in quiet is a great way to reconnect to your inner self and your creativity. Take some out without an digital appliances, to just be with yourself. Take a bath, take a walk in nature (without your phone), go for a cycle ride (with headphones). Look around you and just Be.

Dream Big – how to be creative
Relax – empty your mind
Another way to reconnect to your inner self and your innate creativity is to meditate. Many people think they can’t meditate, but we all do it every day, when we go off into a world of our own whilst on the bus or train, or if we’re sitting in a cafe. We do it when we daydream. I find a lot of my ideas come to me when I’m on the loo or in the bath, because my mind is idling and I’m not really thinking about anything.
Learn something new
Learning something new, like a language or a skill is another great way of opening up and sparking new ideas.
Journal
Many people journal to help them release issues and also to help create new ideas. Others keep a diary. Richard Branson keeps all his old notebooks, where he jots down ideas and often comes back to them years later. I also keep all my old notebooks.
Trust your instincts, and your body – gut reaction
I think this is the most important one. Once you start to work on developing your creativity and being open to new ideas, you may find that you will just ‘know’ when an idea or solution is a good idea. You may even get a physical reaction, such as a feeling in your stomach – your ‘gut reaction’. Learn to trust this.
The Artists Way – how to be creative
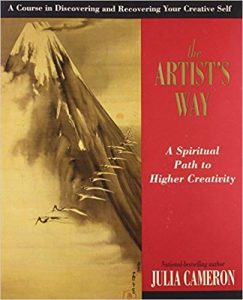
A book that can be very helpful to help you develop your creativity, especially those that don’t consider themselves creative, is The Artist’s Way by Julia Cameron.
The book provides chapters that include exercises to help encourage readers to work through their “I’m not creative” blocks and offers ways to deal with criticism, workaholism and perfectionism. Having worked through the book myself, I can highly recommend this as a way to learn to love your creative self.
To help your creative projects, learn about The Colour Wheel and colour basics here.
Learn about some of the benefits of using good design here.
To discuss your creative project requirements call 0775 341 3005 or email info @ iconiccreative.co.uk.

13 lessons I’ve learnt during my creative career
I’ve worked in the creative industries for over 20 years. Here are 13 lessons I’ve learnt during that time.
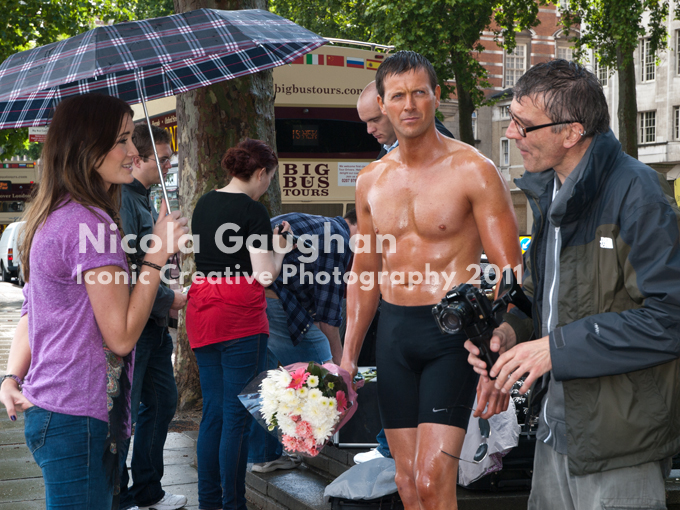
A break in the showers, filming Rough and Ready with Peta Todd & Steve Garry
The Weather
More often than not it will rain if you’re on a location photo or film shoot. On one shoot I did in Highgate, the rain was so torrential I had to use my photographic umbrellas to protect my equipment, not the best way to use them. On another shoot the prolonged showers were so heavy that I had to stand with my camera hidden under my waterproof to protect it, while rain sheeted down my back. I now pack plastic rubbish sacks in my kit to protect it.
They love it, you’re not so keen on it
More often that not your client will pick the design option or photo you like the least. You’ve worked hard to create several options or variations, particularly when designing a logo. There’s the one you, as the designer/photographer love – it’s truly creative, you’re really happy with it, it has the WOW factor, that certain ‘je ne sais pas’ and you can’t wait to put it into your portfolio and share it on social media. Your client chooses and loves the basic option you’ve provided that matches their brief and is effective, but doesn’t quite have as much ‘portfolio potential’.
Budget

Curtains film shoot Director Nathan Evans
Client aspirations often exceed their budget. Sometimes a client will come to you having seen something online and ask you to create something similar for their company or project, but not realise just how much work/time is involved. The challenge here is create something for the client that is still creative, still does the job, still makes the client happy, but is within their budget.
Text
You will almost always be provided with too much text. Whether your client is a large national or international company, or an SME, you will often be asked to squeeze too much copy/text into too small a size of document. Learning to paraphrase supplied text is a skill that all designers soon pick up.
White Space
Or… you design a lovely piece: a leaflet or brochure for instance, and allow lots of lovely ‘white space’ to help the viewer’s eye move easily around the document and the client will insist on adding more and more text in. The skill here is to still keep the beautiful design and the good flow, whilst effectively adding the extra text.
“Can you just knock something up?”
But then the text isn’t ready and there are no images available. It’s like being asked to design with one hand tied behind your back, an almost impossible task. I’ve been asked that question too many times to count…
“It’s urgent – I need it ASAP”
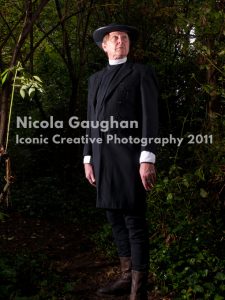
The Priest – Shane Briant – Highgate in between showers
Often this situation is down to lack of planning and understanding of how long the design/print/video/editing process takes. For instance, a brochure can take about 2-3 weeks to layout (depending on how many pages there are) and then another week to print and finish – especially if it’s litho print, as the print needs a couple of days to dry before the folding and stapling stage.
On a photoshoot a photographer can take upwards of 300 images. These take several hours/days to review, edit and process. Professional video editing also takes several hours. The ‘rushes’ need to be reviewed and clips selected to help create the story, then blended to create the final edit, any effects and colour grading added, title graphics created and then exported. The edit of a recent video I did was just over 1 hour, but took nearly 6 hours to export.
Design by committee
Particularly with larger companies, design or video projects will need to go through and be approved by several people, or groups of people. This will often take ‘forever’ as everyone needs to have their say and there will always be one person who thinks of them self as a designer, who insists they know better than the professional.
“Can you photoshop it?”
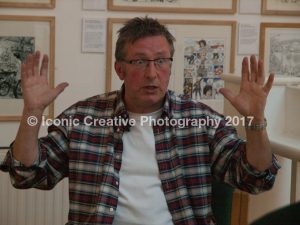
Rowland Rivron Chattoon
Clients over estimate what Photoshop can actually do and how long Photoshop work takes. Photoshop is a great software package and can do some amazing things, but there are some things it just can’t do, or if it can be done, will take hours and hours, pushing the cost well above the client’s budget. The times I’ve been asked this….
It is a joke among designers everywhere that Photoshop has a “Remove XXX (with XXX being whatever the client has asked to be removed) Button”.
“Can I use this image I found on Google/my Facebook page?”
There is soooo much wrong with this. First, images on the internet are far to small for use in print for video and secondly, unless they’re your photos, or they’re ones the client has paid a photographer to take, the copyright isn’t owned by the client. The number of times I’ve been supplied images from the net, or that are too small….
“Just one more change, it won’t take long, I promise”
However large or small the client, there will almost always be just one more change AFTER the job has been sent to print. The number of times I’ve had to ring a printer to ask them if they’ve started printing the job and if they can wait until I send them new artwork……
Exposure
“We don’t have a budget, but you’ll get lots of exposure”. The number of times I’ve been told this, in my design work but also in my photography. Exposure doesn’t pay the bills and shows how some people don’t value the creative industries and expect something for nothing. Would they go into Tesco and say “I need my weekly shop, I don’t have money to pay you but I’ll tell everyone how good your products are?” No.
Photographers are terrorists….apparently
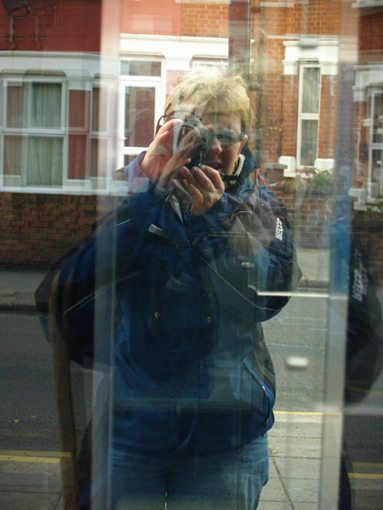
Nicola Gaughan, Photographer
Many police, security people and community police don’t always understand the rights of people taking photos in public. Many photographers have taken to carrying ‘the rules’ with them on all shoots in case they get stopped.
Even I’ve been stopped, a middle aged lady, who walks with a stick and at the time was using a medium format Rolliflex camera. I was stopped by some ‘plastic Plod’, when I was on my photography course. I was using my Dad’s old Rolliflex. If anyone knows how a Rolliflex works, the image is upside down and back to front. It takes some thought and time to make the image look right and get a decent shot, as you’re actually having think upside down and back to front to create your picture.
The plastic plod asked me what I was doing. Seriously? What did they think I was doing? Wondering how facetious I could be without being arrested, I replied ‘Taking photos (under my breath – what do you think I’m doing?)”. According to the plod they had to be careful because of the security situation these days. Seriously? What terrorist is going to use a medium format camera to scope out a location? They’re just going to use a point and shoot camera or their mobile phone.
Learn the basics of the Colour Wheel in our previous blog post.
Check out our case study about the promo we created for Jessica Rose.
To discuss how Iconic Creative Consultants can help you with your project, call 0775 341 3005 or email info @ iconiccreative.co.uk.

The Colour Wheel – Simple Colour fundamentals
Using colour in your design is an important factor in how effective your project is. Understanding and using the Colour Wheel can really help increase that effectiveness.
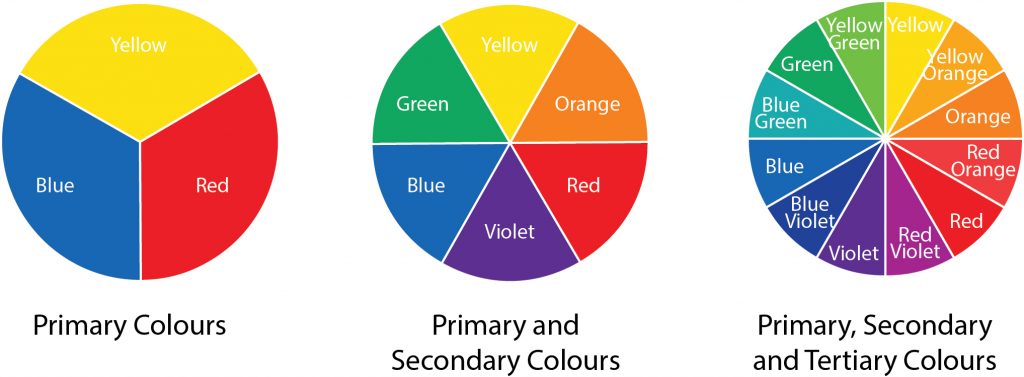
The Colour Wheel
Primary Colours
The first range of colours to understand are the Primary Colours: red, yellow and blue.
Secondary Colours
If you mix the primary colours together, you get more colours:
- red and yellow makes orange
- red and blue makes purple/violet
- yellow and blue makes green
Tertiary Colours
The tertiary colours such as blue green or yellow orange are made by mixing a secondary colour with a primary colour:
- Yellow orange is made by mixing yellow (P) with orange (S)
- Red orange is made by mixing red (P) with orange (S)
- Red violet is made by mixing red (P) with violet (S)
- Blue violet is made by mixing blue (P) with violet (S)
- Blue green is made by mixing blue (P) with green (S)
- Yellow green is made by mixing yellow (P) with green (S)

Complementary colours – colour wheel
Complementary colours
Colours that are opposite each other on the Colour Wheel are called complementary colours. This can be used to great effect in design projects to create impact. For example adding a touch of orange as an accent will lift an area of blue, or highlight some text on a page of blue. This will make it stand out.
This technique can also be used with tints, reducing the tint of one colour, then increasing the strength of another one to add emphasis.

Split complementary colours – colour wheel
Split complementary colours
This colour wheel option uses three colours rather than two. Rather than using the colour directly opposite, it uses the two colours either side of the complementary colour ie if you use violet/purple as the main colour, the two split colours would be yellow green and yellow orange. This gives you a lot more flexibility.

Analogous colours – colour wheel
Analogous colours
The next option to look at is analogous colours – this is made up by three colours next to each other ie blue violet, blue and blue green.
Triadic colours

Triadic colours – colour wheel
As it’s name suggests, the triadic colours option uses three colours. These make up an equilateral triangle on the colour wheel – with the colours equal distances apart ie blue violet, yellow green and red orange. Let one colour become the main colour, with the other two acting as support colours.

Tetradic colours – colour wheel
Tetradic or double complementary colours
A scheme that is more difficult to use, this option uses four colours on the wheel, two lots of complementary colours.
Tints
Tints of one colour
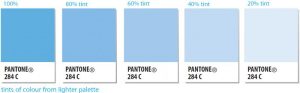
Another way os using colour is to use tints of each colour ie if you use a 10% or 20% of say blue, you can use it to highlight a particular piece of text such as bullet points. When using paint, you can achieve a tint by adding white.
In the days before digital printing, when printing more than one colour was very expensive, using tints was a good way of adding colour and interest, whilst keeping the cost down. Now, with digital printing, using tints is still a good way of adding interest, whilst keeping the overall colour of a piece within the same colour range.

Tints and shades
Shades and tones (including monotones)
Whilst tints (making the colour lighter) are achieved by adding white, you can make the colours darker by adding grey or black.
Using one colour throughout a design can be an effective design method, but can also needs care as it can lead to the design looking very flat.
Black and grey

Black and grey tones
As well as being used to change the colour of and darken other colours, black and grey can be used by themselves to add definition and and interest, especially when producing a one colour ad for newsprint/
Warm and cool colours
Another thing to consider when selecting colours is whether they are warm or cool. The warm colours usually site between yellow-green and red, whilst the cooler colours usually site between green and red-violet.
Colours have meaning (something for another blog post) and can convey emotions, as can the warmth of a colour. The warm colours are more vibrant and have more energy. These are good when creating something that is fun and exciting, such as something for younger people or something such as a fair. The cool colours are calmer and more business like, ideal when designing something for a health or financial business.
Colour calculator
Here’s a handy colour calculator to help you select suitable colours.
Learn more about the steps in the design process in our blog post 13 key steps in the design process
Here are some of the benefits for your business when you use good design.
To discuss your design project with us, please call 0775 341 3005 or email info @ iconiccreative.co.uk

In Conversation with Nicola Gaughan
I was recently interviewed by Ade Oduyemi for his podcast The Whole Lot.
The interview is now available on iTunes here.
Ade says:
I’m an inheritance planner and will writer in my day job.
Someone, in an attempt at humour, once asked the connection between inheritance on the one hand and talking to artists, and business owners on the other.
Not a lot and all of it. Not a lot if you’re dull with not a lot to say.
All of it if you’re good with words and know how to talk.
For my podcast interviews, the sole criterion for invitation is that you’re interesting.
I talk with my guests about what’s important to them.
After all, these are chats between friends rather than police interviews.
A chance to get to know the person behind the business.
These chinwags have been described as: ‘sort of Desert Island Discs, for business managers’ and ‘the sort of conversation one would like to overhear’.
No need to try to snoop or tip-toe.
Listen to my conversation with Nicola here.
My guest is the warmest, most affable, most engaging person you’ll encounter. My face aches from smiling in introducing… Nicola Gaughan.
We talk about loads:
- what she’s thankful for
- producing magical effective marketing
- starting where the reader is
- her father’s part in history
- our debt to the future
I nearly forgot.
I couldn’t thank Nicola enough for her generosity with her time.

Ade Oduyemi
Author Bio
Ade Oduyemi helps ensure families’ wealth is transferred down the generations. His mission is to ensure that several generations hence, your new money would become old money. He’s an inheritance planner. He hosts a podcast series in which he talks to entrepreneurs and artists. He’s an author. You can get a free copy of his latest book, Maximum Inheritance here.
What is a photo? Check out my blog post to learn more.
To discuss your creative needs, call me on 0775 341 3005 or email info @ iconiccreative.co.uk

Case study – Debaere Patisserie leaflet and brochure
Case study – Debaere Patisserie
Who are Debaere Patisserie?
Debaere Patisserie is a wholesale artisan patisserie company based in Perivale.
What do they do?
Debaere Patisserie creates an amazing array of baked goods and patisserie products, that are hand finished. Their products range from croissants and macarons, to large cakes and vegan and gluten free products. All of their products are hand finished, giving an artisan feel.
They have clients all over London, providing early morning baked goods and cakes for a wide range of cafes and coffee houses across the city.
What was their pain point?
The company had little to nothing in the way of effective and eye catching promotional material. They had invested in a rebrand exercise which had produced a lovely new brand for them. They had a folder which the sales team could use to hold price lists and so on, but that was all.
This was holding them back from reaching more clients, as when their potential clients asked to see printed samples of the products, they were unable to supply them. The printouts they currently used were poor quality and didn’t show their products off to their best advantage and didn’t look appetising.
How did we help them?
1st Brief
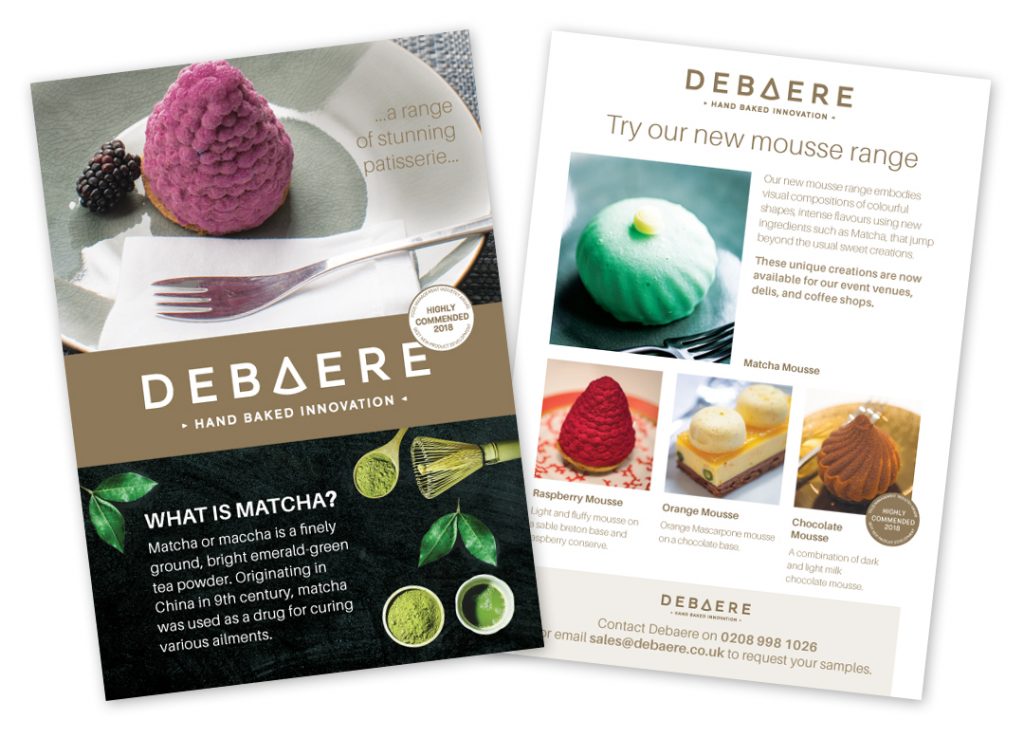
We received 2 briefs from Debaere. The first one was to work on a series of leaflets to showcase their new range of mousse desserts, especially the Matcha one, their bread products and products for a tasty afternoon tea.
1st Solution
We undertook an image search on the internet and created ‘mood boards’ of lifestyle and product shots for each area they wanted to showcase.
We submitted these and the client loved them. Using those ideas we then created concept layouts for each product area. A ‘hero’ page/image was introduced, to highlight the main product. We also suggested a ‘more about this product’ page, explaining the history of bread (for example), or the benefits of Matcha. Using colours and typography we supported the main Debaere brand, but also reflected the different aspects of each product.
Result
Debeare patisserie and mousses leaflet
Debaere really loved the ideas we presented, but they decided to only go with one leaflet initially. When we had designed the concepts we had no information as to what shape/size they needed the leaflets. Once we had the go ahead for the Mousse leaflet, we confirmed the size as A4 double sided, so we then reworked the design so that it worked well on A4, and would also work well as a template for future products.
2nd Brief
Our second brief was to design a brochure to show case all their products, again ensuring that it was consistent with their new brand.
2nd Solution
The client had an initial layout they were thinking of using. We worked with this and developed it so that it reflected the artisan and quality nature of their products.
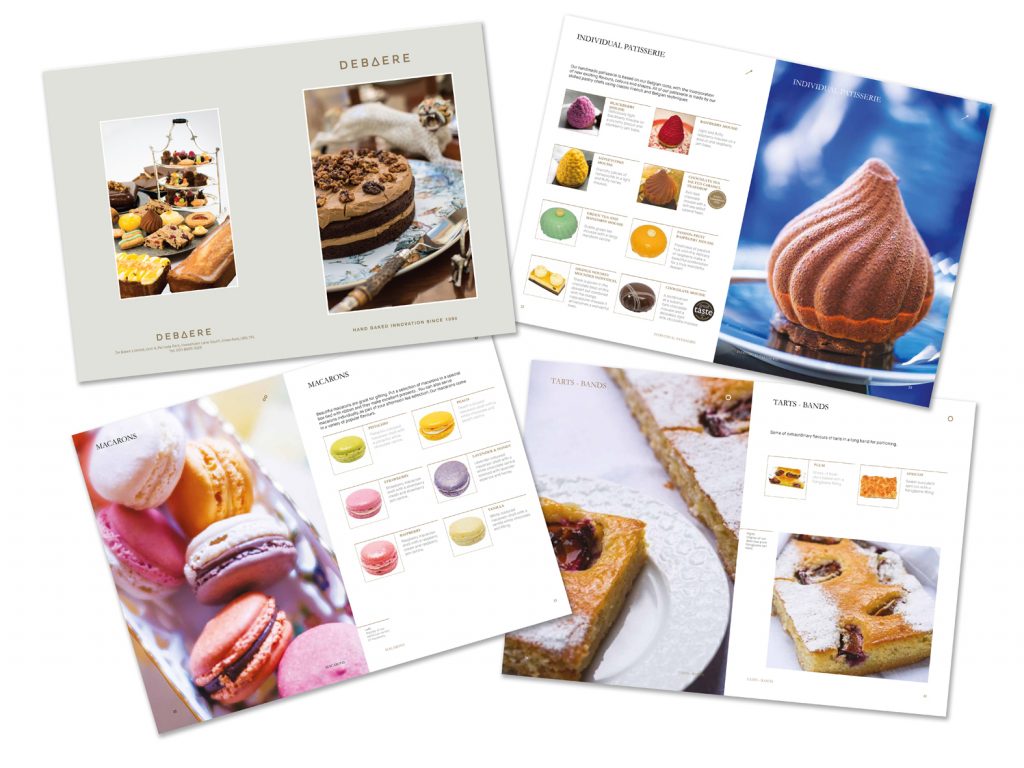
The products
Each product range had its own chapter and own icon. At the start of and sometimes in the middle of each section we introduced life style images of that product. Some times we used product photography that had been supplied by the client. When that was unavailable we had to source images from stock libraries to match their needs.
Working on a brochure is a far bigger job than designing a leaflet. You have to make sure that every product the client wants in there, has the correct photo and correct product details. This involved a lot of liaison with the sales team to ensure everything was in the correct place and had the correct photo.
Page count
The next consideration when creating a brochure (or anything that has more than 4 pages) is the final page count. If it is going to be a printed document, it MUST be divisible by 4 due to the nature of printing. This means that sometimes you have to add pages to get the required number. This was the case here, so we used those extra pages for order and contact details.
Printer’s spreads and final print file
The final job that is advisable when creating a brochure is to create a ‘printer spreads’ version of the artwork for the printer. This means that you create a version that has all the correct pages as spreads so the printer can print it flat. For example page 1 and page 44, page 2 and page 41.
You need to concentrate to ensure this is right. A paper dummy helps, numbering the pages and writing on each page what goes there. When those pages are opened out, they will have the correct spreads. This becomes your printer’s ‘bible’, to refer back to, so it MUST be correct.
This is software available now, used by some printers, that can do this for you, so ask your printer how they want the final print pdf supplied, as single pages or as printer’s spreads.
Result
The client loves the final product. Lots of their clients are asking for a copy. It is also available for download on their website. It has helped make their products and service more visible and more appetising and has started to increase their sales.
Learn how to harness creativity and design to benefit your business here.
To see other leaflets and brochures we’ve designed for clients, visit our website.
To discuss your leaflet or brochure needs, please call 0775 341 3005 or email info @ iconiccreative.co.uk

Treasures of Egypt – Cairo to Abu Simbel
Treasures of Egypt – Cairo to Abu Simbel
I’ve always loved history, especially Egyptian history. I decided I needed a holiday and popped into a travel agent. I originally planned to book a trip to Italy. In the end I came out having booked a trip to Egypt.
Cairo
My trip started in Cairo. We visited the Cairo Museum and were amazed at the beautiful pieces on view. Tutankhamun’s treasures, especially his funeral mask, were stunning, the gold tomb, chair and coffin were breath taking. We saw his sandals, chariot, bows and arrows, as well as every day items. As a child I remember them exhibits coming to London. I remember the long queues to see them all, especially the Mask. Unfortunately, being small I was just pushed passed it and didn’t see it properly. This time I made sure I took plenty of time looking at it. It was stunning.


The Great Pyramid
After visiting the Museum, we had lunch at a restaurant over looking the Great Pyramid (Pyramid of Khufu or the Pyramid of Cheops). It was very surreal. You initially think the pyramids are in the middle of the desert, but they’re not. They are on the Giza plateau, on the edge of Cairo and can be seen from the city. The great pyramid is one of the remaining Seven Wonders of the World.
After lunch we went to the pyramids. The other’s decided to go inside. I’m claustrophobic and decided not to. I visited Cheops’ boat instead, that was found buried in the shadow of one of the three pyramids.
Karnak and Luxor
Later, we got the sleeper train to Karnak temple in Luxor. It is a huge site and has obelisks, statues and a grand hypostyle hall of huge carved columns. If you look up, many of the stone lintels still have paint adhering to them. It is amazing to see what the columns might have looked like over 2,000 years ago.
Karnak market
As with many places on the ‘tourist trail’, there was a market in Luxor, with stalls either side of the road. White lines designated where we could walk without the stall holders hassling us. If we crossed over those lines, we were far game. The trick, we learned, was to saunter slowly down the middle, between the white lines, and view the goods on display, but not showing any interest. Once we had seen something we liked, we could then cross over the line and start the haggling. It became a fun game between us and the stall holders.
Cruising from Luxor to Aswan
We then boarded our small cruise boat, for a 3 day cruise down the Nile to Aswan, visiting Edfu and Kom Umbu enroute. Never having cruised before, it was quite a pleasant feeling to just sit and watch the scenery drift past, watching kids play in the water.
Abu Simbel
Our last stop was a trip to the fabulous temple at Abu Simbel. This involved an armed escort riding with us on our coach ride across the desert.


Abu Simbel is an amazing place. It was moved stone by stone, through internal effort, when the Aswan dam was built.
If you like this post please pin it to your Egypt pinboard on Pinterest.
If you would like to commission us to provide travel or other photography for your project, please call 0775 341 3005 or email info @ iconiccreative.co.uk
