

Video series: How to position yourself on screen
Over 2020 more and more people have had to work from home. They’ve had to become comfortable with online communication. Methods such as Zoom, Microsoft Teams or other online networking platforms.
This can be a little daunting if you’re not used to being in front of a camera. In this short series of blog posts, I’m going to talk about some basic tips to help you become more confident on screen.
Since March I’ve taken part in hundreds of online networking meetings. I have seen people making all sorts of mistakes positioning themselves on screen.
News readers as reference
News readers are a great source of reference. The camera person moves the camera so that the news reader is positioned properly, and the ‘rules’ are the same.
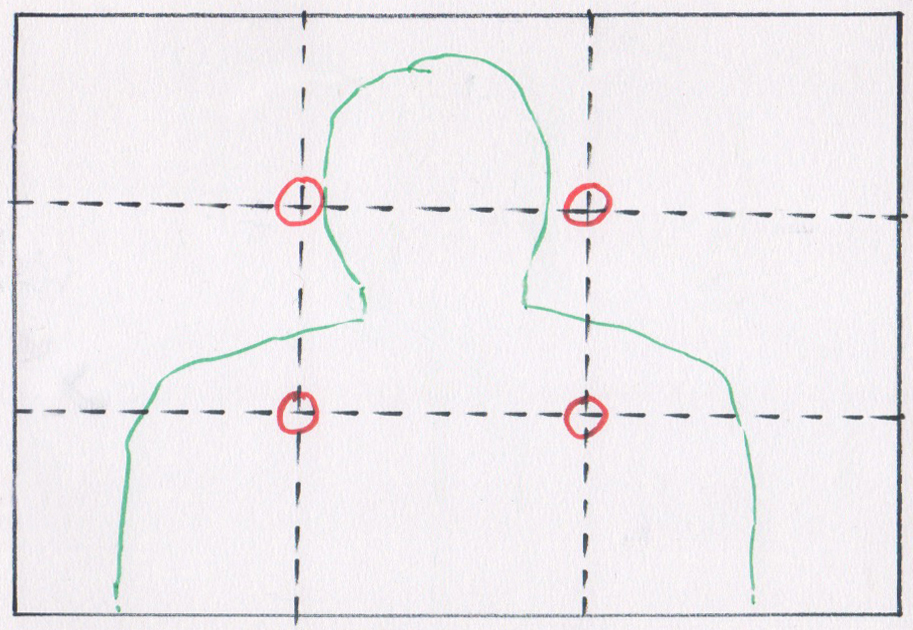
Imagine the screen being divided horizontally by two lines and vertically by two lines. This gives a total of nine rectangles. The points where the lines cross are called Power Points.
Power Points and Central Positioning
Position yourself on screen, where the centre column of three squares are, between the Power Points. Make sure your head is near the top of the screen, about three quarters of the way up the top rectangle.
A Strong Presence and ‘Negative Space’
This gives you a strong presence in the space, and balances your ‘shape’ against the ‘negative space’ around you. Negative in this context doesn’t mean bad, it’s an artistic term.
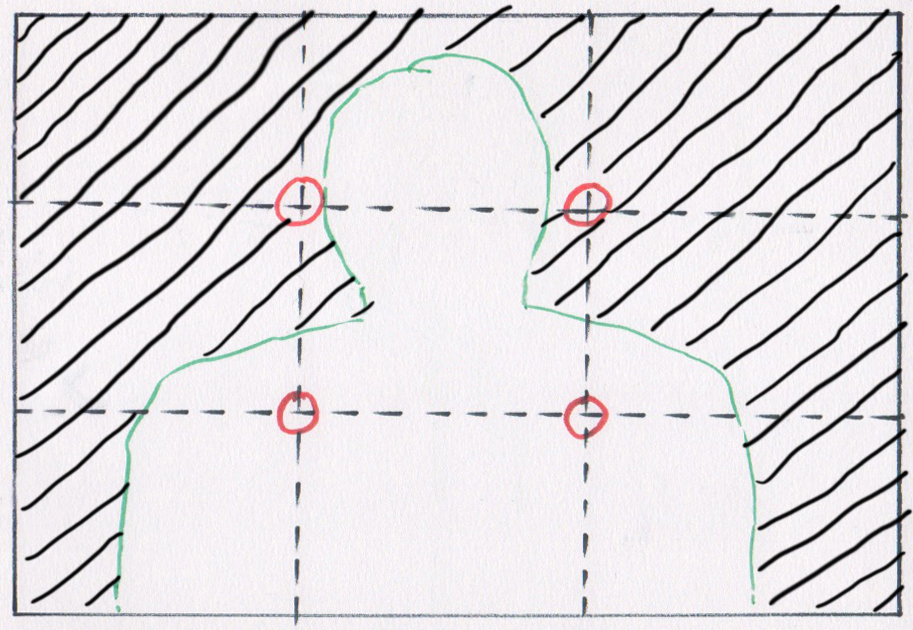
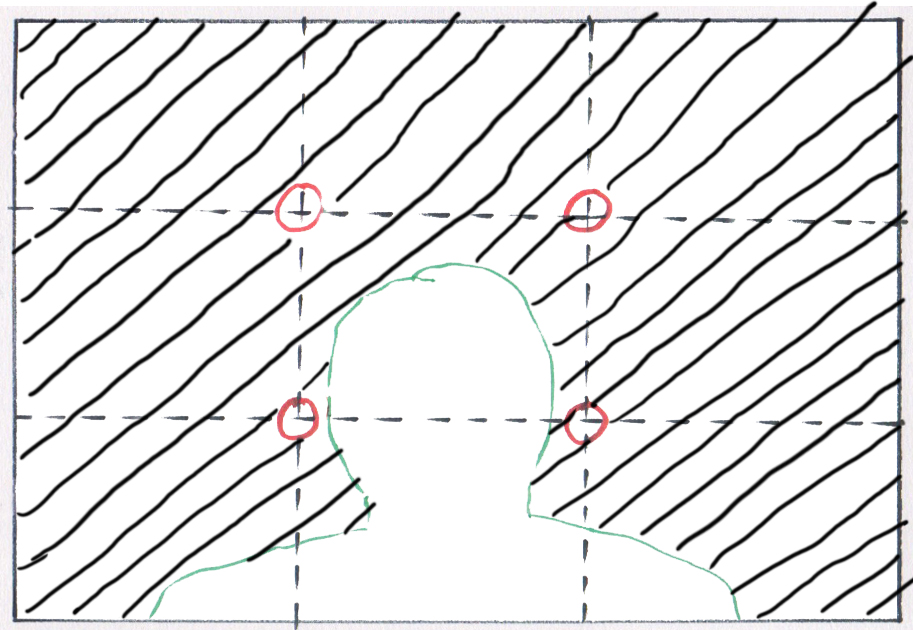
If you position yourself on screen with your head/face further down the screen, you become less prominent. You also look less powerful and the ‘negative’ space becomes unbalanced.
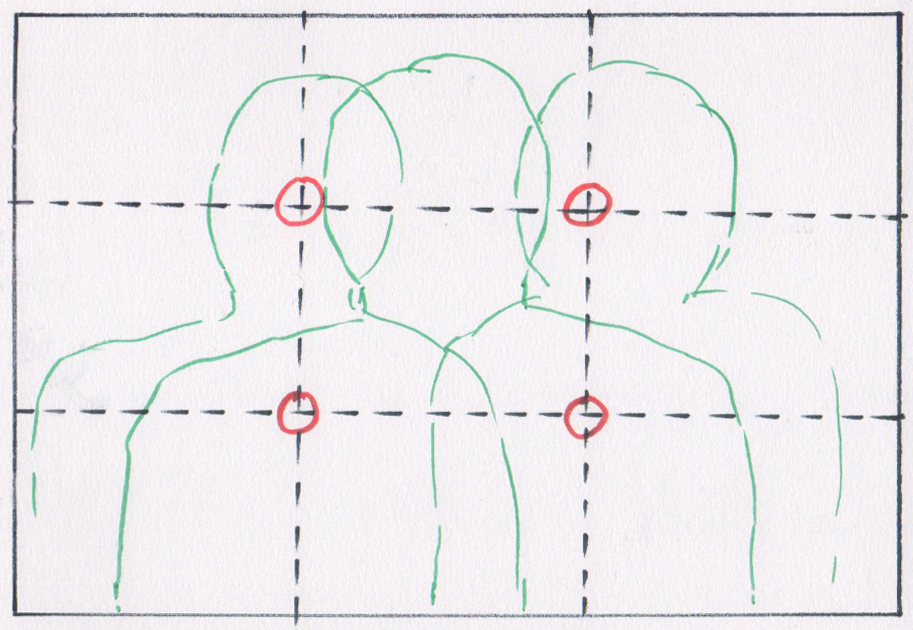
Creating space to add a graphic
If you want to add a graphic later in an edit, it is good to consider positioning. Position yourself on screen either to the right or the left of centre, over the Power Points. Make sure your head is in the same position as when central. This allows space beside you for the graphic.
I hope you found this blog post about positioning yourself onscreen helpful.
A video promo I produced for painter and printmaker Jessica Rose
Have you been thinking of filming projects, but not sure what equipment to use? Check out my blog post The little guide to mobile phone filming here.
To discuss your next video promo project needs call me on 0775 341 3005 or email info @ iconiccreative.co.uk
